amc white mountain guide book

The AMC White Mountain Guide Book is an indispensable resource for hikers, detailing over 600 trails across New Hampshire’s White Mountains with precise descriptions and essential information since 1907․

1․1 Overview of the Appalachian Mountain Club (AMC)

The Appalachian Mountain Club (AMC) is the nation’s oldest outdoor recreation and conservation organization, dedicated to promoting the enjoyment and protection of the natural environment․ Founded in 1872, the AMC focuses on fostering a love for the outdoors through education, advocacy, and trail maintenance․ It operates a network of hiking trails, huts, and lodges, including the iconic White Mountain huts, which provide shelter and resources for hikers․ The AMC’s mission emphasizes conservation, sustainable recreation, and community engagement, making it a cornerstone of outdoor stewardship in the Northeast․ Its work has shaped the White Mountains into a beloved destination for outdoor enthusiasts․

1․2 Purpose of the White Mountain Guide Book

The White Mountain Guide Book serves as an essential companion for hikers and outdoor enthusiasts, providing detailed information on over 600 trails in New Hampshire’s White Mountains․ Its primary purpose is to enable safe and informed exploration of the region by offering precise trail descriptions, elevation profiles, and maps․ The guide also includes practical advice on camping, lodging, and safety, helping users plan their adventures effectively․ Since its first publication in 1907, it has become an indispensable tool for navigating the White Mountains, catering to both experienced hikers and newcomers․ The guidebook’s comprehensive coverage ensures that visitors can fully immerse themselves in the beauty and challenges of the region while staying prepared for its rugged terrain․

1․3 Importance of the Guide for Hikers and Outdoor Enthusiasts

The AMC White Mountain Guide Book is a vital resource for hikers and outdoor enthusiasts, offering detailed trail descriptions and essential information to prevent getting lost․ Its historical significance since 1907 ensures reliability, making it a trusted companion for navigating the White Mountains․ The guide promotes safe and responsible hiking practices, helping users prepare for the region’s challenges․ It caters to both experienced hikers and newcomers, enhancing their ability to explore confidently․ By providing insights into the terrain, the guide supports environmental preservation and sustainable hiking, making it indispensable for anyone venturing into the White Mountains․

History of the AMC White Mountain Guide Book

First published in 1907, the AMC White Mountain Guide Book has evolved over the years, adapting to trail changes and hiker needs, remaining a trusted resource․

2․1 Early Editions and Evolution Over Time

The AMC White Mountain Guide Book debuted in 1907, offering detailed trail descriptions for the region’s expanding network․ Early editions focused on basic trail information, reflecting the era’s limited infrastructure․ Over decades, the guide evolved, incorporating advancements in mapping technology, expanded trail coverage, and updated safety guidelines․ It transitioned from a rudimentary handbook to a comprehensive resource, addressing the growing diversity of hikers’ needs․ The guide’s evolution mirrors the White Mountains’ increasing popularity and the AMC’s commitment to conservation․ Today, it remains a vital tool, blending historical insights with modern updates to cater to both seasoned explorers and newcomers․

2․2 Key Contributors and Editors

The AMC White Mountain Guide Book has benefited from dedicated contributors and editors who shaped its content over the years․ Notable editors include Gene Daniell and Jon Burroughs, who ensured the guide’s accuracy and relevance․ Their meticulous work updated trail descriptions, maps, and safety information, reflecting the region’s dynamic landscape․ Additional contributors, such as Steve Smith and Dick Jenkins, provided detailed insights and historical context, enhancing the guide’s depth․ These individuals’ passion for the White Mountains and commitment to conservation have made the guide an essential resource for hikers․ Their contributions ensure the guide remains a trusted companion for outdoor enthusiasts, blending tradition with modern needs․

2․3 Historical Significance in the White Mountains

The AMC White Mountain Guide Book holds profound historical significance, serving as a cornerstone for exploring the White Mountains since 1907․ It has played a pivotal role in promoting tourism and conservation efforts, documenting the region’s trails and natural beauty․ The guidebook has inspired generations of hikers, fostering a deeper appreciation for the area’s wilderness․ Its historical accounts and detailed trail descriptions have preserved the region’s cultural and environmental heritage․ By educating hikers about responsible outdoor practices, the guide has contributed to the preservation of the White Mountains’ pristine landscapes․ Its enduring legacy underscores its importance as both a historical document and a modern resource for outdoor enthusiasts․

Features of the AMC White Mountain Guide Book

The AMC White Mountain Guide Book offers detailed trail descriptions, elevation profiles, maps, camping information, and safety tips, making it a trusted resource for hikers and outdoor enthusiasts․

3․1 Detailed Trail Descriptions

The AMC White Mountain Guide Book provides meticulous trail descriptions, including distance, difficulty, scenery, and landmarks․ Each trail’s unique characteristics, such as terrain, elevation changes, and potential hazards, are highlighted․ This ensures hikers can plan their routes effectively, understanding what to expect․ The descriptions cater to all skill levels, from novice to experienced hikers, offering insights into trail conditions and seasonal variations․ Detailed information helps users make informed decisions, enhancing their safety and overall hiking experience in the White Mountains․

3․2 Elevation Profiles and Maps

The AMC White Mountain Guide Book includes detailed elevation profiles and maps, essential for understanding trail terrain and difficulty․ These visuals provide hikers with a clear picture of elevation changes, helping to assess the physical demands of a trail․ Maps are meticulously crafted, highlighting key landmarks, trail intersections, and water sources․ Elevation profiles aid in planning by revealing steep sections and long ascents, ensuring hikers are prepared․ These tools are vital for safety and route-finding, allowing users to make informed decisions about their hikes․ The combination of maps and profiles enhances the overall planning and navigation experience for hikers in the White Mountains․

3․3 Information on Camping and Lodging

The AMC White Mountain Guide Book provides extensive information on camping and lodging options in the White Mountains․ It details backcountry campsites, AMC huts, and nearby hotels, offering insights into amenities and accessibility․ The guide also includes regulations for camping in wilderness areas, such as permits and environmental guidelines․ Readers can find tips on securing reservations for popular spots and advice on choosing accommodations that suit their hiking plans․ This section is invaluable for planning overnight stays, ensuring hikers can focus on their adventures with confidence․ The guide’s lodging information helps users make informed decisions about where to stay during their White Mountain explorations․

3․4 Safety Tips and Best Practices

The AMC White Mountain Guide Book emphasizes safety with practical tips and best practices for hikers․ It advises carrying essential gear like maps, first aid kits, and headlamps․ The guide highlights the importance of checking weather forecasts and being prepared for sudden changes․ It also covers navigation skills, suggesting the use of compasses and GPS devices․ Additionally, the guide provides recommendations for avoiding common hazards such as steep drop-offs and fast-moving streams․ It encourages hikers to stay on marked trails to minimize environmental impact․ By following these guidelines, hikers can ensure a safer and more enjoyable experience in the White Mountains․

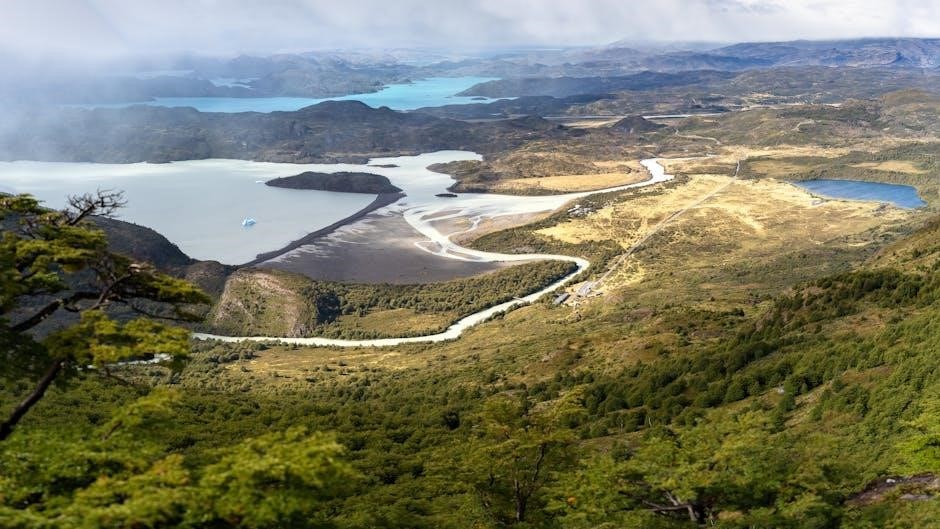
Popular Hiking Trails in the White Mountains

The White Mountains offer iconic trails like the Presidential Traverse, Pemi Loop, and Franconia Ridge, catering to both experienced hikers and casual explorers seeking adventure․

4․1 The Presidential Traverse

The Presidential Traverse is a premier 23-mile hiking challenge in the White Mountains, spanning the Presidential Range․ It includes peaks like Mount Washington, the highest in the Northeast․ Hikers experience stunning alpine vistas and rigorous terrain․ The AMC guide provides detailed trail descriptions, elevation profiles, and essential tips for tackling this iconic route․ Preparation is key due to unpredictable weather and physically demanding trails․ This traverse is a bucket list adventure for many, offering unforgettable views and a true test of endurance․ The guidebook ensures hikers are well-informed to navigate this spectacular yet challenging trek safely and effectively․

4․2 The Pemi Loop Hike

The Pemi Loop Hike is a 31․5-mile circuit around the Pemigewasset Wilderness, offering a challenging yet rewarding experience․ Known for its rugged terrain and stunning alpine views, it features notable peaks like Mount Liberty and Bondcliff․ Hikers encounter dense forests, river crossings, and exposed ridges․ While less crowded than the Presidential Traverse, the Pemi Loop demands endurance and preparation due to its remote nature and rough trails․ The AMC guide provides essential details, including elevation profiles and water sources, helping hikers plan and navigate this iconic loop effectively․

4․3 Franconia Ridge Trail

The Franconia Ridge Trail is a 9-mile route offering breathtaking alpine landscapes and panoramic views of the White Mountains․ It traverses the Franconia Ridge State Park, featuring iconic peaks like Mount Lafayette, Mount Lincoln, and Little Haystack Mountain․ Known for its challenging terrain and exposed ridges, the trail attracts both day hikers and thru-hikers․ The AMC guide provides detailed descriptions of trail conditions, elevation changes, and scenic highlights, making it an essential resource for navigating this popular and spectacular trail․ Hikers are rewarded with stunning vistas and unique alpine ecosystems along the way․

4․4 Other Notable Trails

Beyond the Presidential Traverse and Pemi Loop, the White Mountains offer a variety of other notable trails․ The Appalachian Trail winds through the region, offering iconic sections like the Franconia Ridge․ The Galehead Trail provides a serene, lesser-traveled route to the Pemigewasset Wilderness․ The Old Bridle Path, steeped in history, connects hikers to the Franconia Ridge, offering stunning views․ These trails, along with others, cater to diverse skill levels and interests․ The AMC guidebook provides detailed descriptions, including trail lengths, elevation gains, and scenic highlights, making it an invaluable resource for exploring the White Mountains’ extensive trail network․

Practical Information for Hikers

The AMC White Mountain Guide provides essential practical information for hikers, covering trip planning, safety measures, and environmental considerations to ensure a well-prepared adventure․

5․1 Water Sources and Hydration

The AMC White Mountain Guide provides detailed information on water sources along trails, helping hikers locate reliable streams, springs, and ponds․ It emphasizes the importance of proper hydration and offers tips on water filtration or treatment to ensure safety․ The guide also highlights areas where water may be scarce, advising hikers to plan accordingly․ For example, on long trails like the Pemi Loop, knowing water sources is crucial for endurance․ The guide recommends carrying a water filter or purification tablets to safely use natural water sources, ensuring hikers stay hydrated throughout their journey in the White Mountains․

5․2 Navigation and Route-Finding

The AMC White Mountain Guide provides essential navigation tools, including detailed maps and trail descriptions, to help hikers stay on course․ It highlights key landmarks, junctions, and signage, enabling users to identify their location accurately․ The guide also offers tips on using GPS and compass navigation, especially in areas with limited visibility․ For challenging trails like the Presidential Traverse, the guide emphasizes the importance of understanding route markings and carrying a map․ By combining modern tools with traditional navigation skills, hikers can confidently explore the White Mountains, ensuring a safe and enjoyable experience․

5․3 Weather and Climate Considerations

The White Mountains are known for unpredictable weather, with rapid temperature changes, dense fog, and strong winds, especially at higher elevations․ The AMC guidebook emphasizes the importance of checking forecasts before hiking and staying informed about weather conditions․ Hikers are advised to dress in layers, using breathable and waterproof clothing, to adapt to changing conditions․ Early morning starts are recommended to avoid afternoon thunderstorms, common in the region․ Winter hikers should be prepared for deep snow and icy trails, requiring crampons and ice axes․ The guide also warns about the dangers of hypothermia and the need to monitor weather changes, turning back if conditions become unsafe․

5․4 Emergency Preparedness

The AMC White Mountain Guide Book stresses the importance of being prepared for emergencies․ Hikers should always carry a first aid kit, flashlight, whistle, and emergency shelter․ A portable phone charger is essential for maintaining communication․ The guide recommends packing extra water, snacks, and layers, as weather conditions can change rapidly․ Knowing how to use a map and compass is crucial, as GPS signals may be unreliable․ Hikers are advised to inform someone of their itinerary and expected return time․ In case of an emergency, staying calm, finding or creating a visible landmark, and conserving energy are key․ The guide also provides tips on signaling for help and managing injuries․

Conservation Efforts in the White Mountains

The AMC White Mountain Guide Book highlights the club’s conservation efforts, including trail maintenance, environmental protection, and promoting sustainable hiking practices to preserve the region’s natural beauty․

6․1 AMC’s Role in Trail Maintenance

The Appalachian Mountain Club plays a vital role in maintaining the trails of the White Mountains, ensuring they remain accessible and safe for hikers․ AMC trail crews work tirelessly to repair and improve trail infrastructure, clear debris, and address erosion issues․ Additionally, the club organizes volunteer programs that engage the community in trail upkeep․ By combining professional expertise with grassroots efforts, AMC ensures the preservation of these natural pathways for future generations․ Their work is essential in balancing recreational use with environmental protection, maintaining the delicate balance of the region’s ecosystem while supporting outdoor enthusiasts․ The guidebook highlights these efforts, emphasizing stewardship and sustainability․

6․2 Environmental Protection Initiatives

The Appalachian Mountain Club actively supports environmental protection initiatives in the White Mountains, focusing on preserving the region’s natural beauty and ecological balance․ These efforts include advocating for sustainable land-use practices, combating invasive species, and promoting eco-friendly hiking habits․ The AMC collaborates with local organizations and government agencies to implement conservation projects that protect sensitive habitats and wildlife corridors․

By educating hikers about Leave No Trace principles and responsible trail use, the AMC ensures that outdoor enthusiasts contribute to environmental preservation․ The guidebook serves as a tool to raise awareness about these initiatives, encouraging users to play an active role in safeguarding the White Mountains for future generations․

6․3 Sustainable Hiking Practices

Sustainable hiking practices are central to preserving the White Mountains’ natural beauty and ecological integrity․ The AMC White Mountain Guide Book emphasizes the importance of Leave No Trace principles, encouraging hikers to minimize their environmental footprint by staying on designated trails, carrying out all waste, and avoiding disturbance to wildlife․ By promoting eco-friendly habits, the guidebook helps hikers enjoy the outdoors responsibly while ensuring the region remains pristine for future generations․

These practices not only protect the environment but also enhance the hiking experience, fostering a deeper connection to nature and promoting safety for both hikers and wildlife․ The guidebook serves as a vital resource for ethical outdoor exploration․

Cultural and Historical Significance

The AMC White Mountain Guide Book holds historical significance, documenting the region’s trails since 1907 and preserving its cultural heritage․ It highlights key events, like Emma Cummings’ 1902 hike, and the AMC’s role in promoting the White Mountains as a recreational destination․

7․1 Indigenous Peoples and the White Mountains

The White Mountains have deep cultural significance for Indigenous Peoples, including the Abenaki and Pennacook tribes, who revered the region for its spiritual and resource-rich landscape․ These Native American communities thrived in the area for centuries, relying on its forests, rivers, and wildlife for sustenance and ceremonial practices․ The AMC White Mountain Guide Book acknowledges this rich history, offering insights into the region’s Indigenous heritage and its enduring influence on the area’s identity․ By preserving these stories, the guidebook fosters respect and appreciation for the land’s original stewards, ensuring their legacy endures for future generations of hikers and explorers․

7․2 Early Exploration and Settlement

The White Mountains were first explored by European settlers in the 18th century, drawn by their natural resources and scenic beauty․ Early exploration focused on logging, mining, and trade, with the region becoming a hub for outdoor activities․ The construction of the Kancamagus Highway in 1837 marked a turning point, opening the area to broader exploration and tourism․ The AMC White Mountain Guide Book, first published in 1907, played a pivotal role in documenting trails and promoting the region’s potential for hiking and conservation․ This period laid the foundation for the White Mountains’ transformation into a beloved destination for outdoor enthusiasts, as detailed in the guidebook․

7․3 The Role of the AMC in Preserving History

The Appalachian Mountain Club (AMC) has played a significant role in preserving the historical and cultural heritage of the White Mountains․ Since its founding, the AMC has documented the region’s history, including early exploration and settlement, through its guidebooks and publications․ The White Mountain Guide Book, first published in 1907, not only provides practical information for hikers but also highlights the historical significance of trails, landmarks, and natural features․ By maintaining detailed records and promoting responsible stewardship, the AMC has helped protect the region’s legacy for future generations․ This commitment to preserving history aligns with the club’s mission to promote conservation and outdoor education․

How to Use the Guide Effectively

Maximize your experience by understanding trail ratings, using elevation profiles for planning, and staying updated with the latest editions for accurate and safe hiking adventures․

8․1 Understanding Trail Ratings and Difficulty

The AMC White Mountain Guide Book provides detailed trail ratings to help hikers assess difficulty․ Trails are classified from easy to extremely difficult, considering factors like elevation gain, terrain, and obstacles․ By understanding these ratings, hikers can choose paths that match their skill levels and physical capabilities․ The guide also offers insights into trail conditions, helping users prepare for challenges such as steep inclines or rocky surfaces․ This system ensures hikers can make informed decisions, enhancing safety and enjoyment in the White Mountains․

8․2 Planning a Trip with the Guide

The AMC White Mountain Guide Book is an essential tool for planning a successful hiking trip․ It provides detailed trail descriptions, elevation profiles, and maps to help users choose routes that match their abilities․ Hikers can assess trail difficulty, plan itineraries, and identify key landmarks and water sources․ The guide also offers insights into camping and lodging options, ensuring travelers are well-prepared․ By leveraging this comprehensive resource, hikers can create a safe and enjoyable experience in the White Mountains, tailoring their adventure to suit their preferences and skill levels effectively․

8․3 Updating and Supplementing the Guide

The AMC White Mountain Guide Book is regularly updated to reflect changes in trail conditions, new routes, and environmental factors․ Supplements, such as digital versions and app integrations, provide users with real-time updates and additional resources․ Hikers can access GPS data, trail closures, and weather alerts through these digital tools․ Seasonal updates ensure the guide remains relevant, addressing variations in trail accessibility and hazards․ By incorporating feedback from hikers and experts, the guide evolves to meet the needs of outdoor enthusiasts․ These updates and supplements enhance the guide’s accuracy and utility, ensuring it remains a trusted companion for White Mountain explorers․

User Reviews and Testimonials

Hikers praise the AMC White Mountain Guide Book for its detailed trail descriptions and reliability․ Seasoned adventurers and first-time users alike appreciate its accuracy and comprehensive coverage․

9․1 Feedback from Seasoned Hikers

Seasoned hikers consistently praise the AMC White Mountain Guide Book for its reliability and depth․ Many highlight its detailed trail descriptions, accurate elevation profiles, and essential information on water sources․ Veteran adventurers appreciate the guide’s comprehensiveness, noting it as an indispensable tool for navigating the White Mountains’ complex trail network․ Some long-time users have relied on the guide for decades, valuing its updates and thoroughness․ While a few suggest improvements, like expanded digital features, the majority commend its accuracy and practicality․ Hikers often describe it as a “trusted companion” for both planning and executing their trips in the region․

9․2 Experiences of First-Time Users

First-time users of the AMC White Mountain Guide Book often express appreciation for its clarity and comprehensiveness․ Many find the detailed trail descriptions and maps invaluable for planning and navigating the White Mountains․ New hikers praise the guide’s ease of use, noting how it helps them feel more prepared and confident on the trails․ Some first-time users highlight the guide’s ability to demystify complex routes, while others appreciate the practical tips on camping and safety․ Overall, the guide is seen as an essential tool for newcomers, fostering a sense of adventure and connection to the region’s natural beauty․

9․3 Criticisms and Suggestions for Improvement

Despite its popularity, some users critique the AMC White Mountain Guide Book for being heavy and less convenient for backpackers․ Others note that certain trail descriptions can feel outdated, especially after recent changes in trail conditions or reroutes․ Additionally, a few hikers suggest that the guide could benefit from more detailed information on lesser-known trails and family-friendly routes․ To enhance user experience, suggestions include incorporating more photos, improving the organization of trail listings, and offering digital versions with interactive maps․ Addressing these concerns could further solidify the guide’s reputation as an indispensable resource for White Mountains explorers․

The Future of the AMC White Mountain Guide Book

The AMC White Mountain Guide Book will evolve with digital versions, app integration, and expanded coverage, ensuring it remains a vital resource for future hikers․

10․1 Digital Versions and App Integration

The AMC White Mountain Guide Book is evolving with digital versions and app integration, enhancing accessibility for modern hikers․ These digital tools offer GPS tracking, real-time updates, and offline access, ensuring users stay connected even in remote areas․ The app will provide interactive maps, trail conditions, and weather alerts, making trip planning more efficient․ Digital versions will also allow for easier updates, keeping hikers informed about trail changes and conservation efforts․ This integration aims to cater to both seasoned adventurers and first-time users, ensuring the guide remains a vital resource for exploring the White Mountains․ Expanded coverage areas and improved user interfaces will further enhance the guide’s utility in the digital age․

10․2 Expanding Coverage Areas

The AMC White Mountain Guide Book is expanding its coverage to include more trails, regions, and points of interest in the White Mountains․ This initiative aims to provide hikers with a more comprehensive resource, catering to both locals and visitors․ New editions will incorporate lesser-known trails and updated information on trail networks, ensuring that all areas of the White Mountains are thoroughly documented․ Collaborations with local experts and conservation groups will enhance the guide’s accuracy and depth․ By broadening its scope, the guide will continue to be an indispensable tool for exploring the region’s diverse landscapes and hidden gems, making it even more valuable for outdoor enthusiasts․

10․3 Incorporating New Technologies

The AMC White Mountain Guide Book is embracing modern advancements by incorporating new technologies to enhance user experience․ Digital versions of the guide now offer interactive maps, GPS integration, and real-time trail updates, making it easier for hikers to navigate․ An accompanying app provides offline access to trail data, ensuring reliability in areas with limited connectivity․ Additionally, augmented reality features are being explored to offer immersive previews of trails and landmarks․ These innovations aim to make the guide more accessible and user-friendly while maintaining its core mission of promoting safe and enjoyable exploration of the White Mountains․

hyper tough 20 inch lawn mower manual pdf

The Hyper Tough 20 Inch Lawn Mower Manual is a comprehensive guide for understanding and maintaining your mower, covering assembly, operation, safety, and troubleshooting for optimal performance.

Overview of the Hyper Tough 20 Inch Lawn Mower

The Hyper Tough 20 Inch Lawn Mower is a powerful, lightweight, and versatile gardening tool designed for efficient yard maintenance. It features a robust 159cc gas-powered engine, a 20-inch cutting deck, and a Prime N Pull starting system for quick and easy operation. Weighing only 44.5 pounds, it offers excellent maneuverability, making it ideal for small to medium-sized yards. The mower is equipped with a 3-in-1 cutting system, allowing users to choose between mulching, bagging, or side-discharging grass clippings. Its durable design ensures long-lasting performance, while its fuel-efficient engine maximizes cutting capacity with minimal fuel consumption, providing a reliable and eco-friendly mowing experience.

Importance of the Manual for Users

The Hyper Tough 20 Inch Lawn Mower Manual is a vital resource for users, providing detailed instructions for safe and effective operation. It includes essential safety precautions, assembly steps, and maintenance tips to ensure optimal performance. By following the manual, users can troubleshoot common issues, understand proper usage, and extend the lifespan of their mower. The guide also outlines eco-friendly practices and waste disposal methods, promoting environmentally responsible mowing. Whether you’re a novice or experienced user, the manual serves as a comprehensive reference to maximize efficiency and safety while maintaining your lawn care tool.

Structure and Content of the Manual

The Hyper Tough 20 Inch Lawn Mower Manual is organized into clear sections, starting with an introduction and safety guidelines. It includes detailed assembly instructions, step-by-step operating guides, and maintenance schedules. The manual also features troubleshooting tips for common issues like engine problems and uneven cutting. Diagrams and part identifications are provided to help users locate and replace components easily. Additionally, eco-friendly practices and winter storage advice are covered, ensuring comprehensive care for the mower. This structured approach makes it easy for users to navigate and find specific information quickly, enhancing their overall mowing experience.

Key Features and Specifications

The Hyper Tough 20 Inch Lawn Mower features a 20-inch cutting deck, lightweight design, and durable construction. It includes a powerful 159cc engine, 3-in-1 cutting options, and fuel efficiency for small to medium yards, ensuring reliable performance and easy maneuverability.

Engine and Powertrain Details

The Hyper Tough 20 Inch Lawn Mower is equipped with a powerful 159cc engine, providing reliable performance for efficient mowing. The engine features a Prime N Pull starting system, designed for easy ignition; This gas-powered mower eliminates the need for batteries or cords, offering consistent power delivery. The engine’s design ensures reduced emissions and optimal fuel efficiency, making it suitable for small to medium-sized yards. Regular maintenance, as detailed in the manual, is essential to uphold engine performance and longevity. The mower’s lightweight frame complements its robust powertrain, enhancing maneuverability and user comfort during operation. Proper care ensures years of reliable service.

Cutting Deck and Size

The Hyper Tough 20 Inch Lawn Mower features a durable 20-inch steel cutting deck, designed for efficient mowing of small to medium-sized yards. The deck’s compact size allows for precise cutting and easy maneuverability around obstacles. Constructed from high-quality steel, it ensures long-lasting performance and consistent cutting results. The mower also offers 3-in-1 functionality, enabling mulching, bagging, and side discharge options for versatility. With a 7-position single-lever height adjustment, users can easily customize cutting heights to suit various grass types and conditions. This robust design ensures a clean, even cut every time, making it ideal for maintaining a well-groomed lawn with minimal effort.

Weight and Maneuverability

The Hyper Tough 20 Inch Lawn Mower is designed for ease of use, weighing approximately 44.5 pounds, making it lightweight and easy to maneuver. Its compact design allows for smooth navigation around obstacles, such as trees and gardens, while maintaining control and balance. The ergonomic handle provides a comfortable grip, reducing fatigue during extended mowing sessions. This lightweight construction ensures that users can effortlessly push the mower across various terrain types without straining. The combination of its reduced weight and balanced design makes it ideal for small to medium-sized yards, ensuring efficient and stress-free lawn maintenance.

Fuel Efficiency and Performance

The Hyper Tough 20 Inch Lawn Mower is equipped with a fuel-efficient 159cc engine, designed to deliver reliable performance while minimizing fuel consumption. The engine features a Prime N Pull starting system, ensuring quick and easy ignition with minimal effort. This mower excels in cutting through various grass types, offering consistent results. Its 20-inch cutting deck and 3-in-1 cutting options enhance versatility, allowing for efficient bagging, mulching, or side discharge. With optimal fuel usage and powerful cutting capabilities, this mower provides a balance of performance and eco-friendliness, making it a practical choice for small to medium yards.

Assembly and Initial Setup

The Hyper Tough 20 Inch Lawn Mower Manual provides clear, detailed assembly and initial setup instructions, ensuring a straightforward process with essential safety guidelines and tool requirements.

Unpacking and Inventory of Parts

Begin by carefully unpacking the Hyper Tough 20 Inch Lawn Mower from its box. Ensure all components, including the mower deck, handlebars, wheels, and accessories, are accounted for. Cross-reference the parts list provided in the manual to confirm completeness. Inspect each part for damage or defects. Locate the hardware bag containing bolts, nuts, and screws, and organize them for easy access. Familiarize yourself with the parts diagram to understand the assembly process better. This step ensures a smooth setup and helps identify any missing or damaged items before proceeding with assembly.

Step-by-Step Assembly Instructions

Follow the manual’s guidance to assemble your Hyper Tough 20 Inch Lawn Mower. Begin by attaching the handlebars to the mower deck using the provided bolts, ensuring they are securely tightened. Next, install the wheels, making sure they are properly aligned and fastened. Attach the grass catcher or discharge chute, depending on your preferred mowing option. Refer to the parts diagram for accurate placement of each component. Tighten all connections firmly and double-check the blade for correct installation. Finally, ensure all safety features are in place and the handlebars are locked securely. This step-by-step process ensures a safe and efficient setup.

Initial Safety Checks

Before operating the Hyper Tough 20 Inch Lawn Mower, perform essential safety checks. Inspect the mower for loose or damaged parts, ensuring all bolts and screws are tightly secured. Verify that the blade is properly installed and free from damage. Check the handlebars for stability and ensure they are locked in place. Examine the cutting deck for debris and ensure all safety guards are in position. Confirm that the mower is on a level surface and the surrounding area is clear of obstacles. Familiarize yourself with the emergency stop mechanism and ensure it functions correctly. Always wear protective gear, such as gloves and eyewear, during operation.

Operating Instructions

Understand the Hyper Tough 20 Inch Lawn Mower’s operation, including starting procedures, adjusting cutting height, and using 3-in-1 cutting options for efficient mowing experiences.

Starting the Lawn Mower

To start the Hyper Tough 20 Inch Lawn Mower, ensure the mower is on a level surface and the engine is cool. Prime the engine by pressing the primer bulb 2-3 times. Move the choke lever to the “start” position. Grip the handle firmly and pull the recoil cord steadily until you feel resistance. Release the cord slowly and allow it to rewind. Once the engine starts, let it warm up for a few seconds before adjusting the choke to the “run” position. Always wear safety gear and ensure the area is clear of debris.

Adjusting the Cutting Height

Adjusting the cutting height on the Hyper Tough 20 Inch Lawn Mower is straightforward. Locate the height adjustment lever, typically found on the mower’s handle or near the cutting deck. Move the lever to one of the 7 available positions, ranging from 1.5 to 4 inches. For optimal results, choose a height that leaves your grass at least 2.5 inches tall to promote healthy growth. Always wear protective gear and ensure the mower is on a level surface before making adjustments. Proper height adjustment ensures even cutting and prevents damaging your lawn.

Using the 3-in-1 Cutting Options

The Hyper Tough 20 Inch Lawn Mower offers versatile 3-in-1 functionality, allowing you to bag, mulch, or side-discharge clippings. For bagging, attach the provided grass catcher and ensure it’s securely locked. To mulch, remove the catcher and install the mulching plug, which chops clippings into fine particles. For side-discharge, simply attach the discharge chute. Each option is designed for different mowing needs, promoting efficient lawn maintenance. Refer to the manual for specific instructions on switching between modes and ensuring proper installation of accessories for optimal performance and safety.

Maintenance and Upkeep

Regular maintenance ensures optimal performance of your Hyper Tough 20 Inch Lawn Mower. Clean the mower after use, sharpen the blade seasonally, and change the oil as recommended.

Cleaning the Lawn Mower

Regular cleaning is essential for maintaining the performance and longevity of your Hyper Tough 20 Inch Lawn Mower. Start by turning off the engine and allowing it to cool. Remove any debris, grass clippings, or dirt from the cutting deck using a brush or cloth. Check and clean the mower deck regularly to prevent clogging. Use a damp cloth to wipe down the exterior, avoiding electrical components. Inspect the air filter and replace it if necessary. Proper cleaning ensures smooth operation and prevents damage; Refer to the manual for specific guidance on cleaning procedures and recommended tools.

Sharpening the Blade

Sharpening the blade of your Hyper Tough 20 Inch Lawn Mower is crucial for maintaining cutting efficiency and preventing damage to the grass. Begin by disconnecting the spark plug for safety. Remove the blade and inspect it for wear or damage. Use a grinder or file to sharpen the cutting edge, ensuring evenness on both sides. Avoid over-sharpening, as this can weaken the blade. After sharpening, balance the blade to maintain proper mower performance. Reinstall the blade securely and test the mower on a small area to ensure it cuts evenly. Regular sharpening prolongs blade life and enhances mowing results.

Changing the Oil

Changing the oil in your Hyper Tough 20 Inch Lawn Mower is essential for maintaining engine health and performance. Locate the oil drain plug underneath the mower and place a drip pan to catch the old oil. Use a socket wrench to remove the plug and allow the oil to drain completely. Replace the plug and fill the engine with the recommended type and amount of oil, as specified in the manual. Dispose of the used oil responsibly. Regular oil changes ensure the engine runs smoothly, prevents overheating, and extends the lifespan of your mower.

Winter Storage Tips

Proper winter storage is crucial to maintain your Hyper Tough 20 Inch Lawn Mower’s performance and longevity. Clean the mower thoroughly, removing dirt and debris from the deck and blades. Drain the fuel tank or use a fuel stabilizer to prevent corrosion. Change the oil and sharpen the blade before storage. Store the mower in a cool, dry place, away from direct sunlight and moisture. Cover the mower to protect it from dust and pests. Ensure all parts are secure and follow the manual’s specific winter storage recommendations to ensure your mower is ready for the next mowing season.

Troubleshooting Common Issues

Troubleshooting common issues with your Hyper Tough 20 Inch Lawn Mower involves identifying symptoms like poor starting, uneven cutting, or overheating. Check fuel levels, blade sharpness, and air filters. Ensure proper maintenance and refer to the manual for diagnostic guides and solutions to restore optimal performance quickly and effectively.

Difficulty Starting the Engine

If the Hyper Tough 20 Inch Lawn Mower’s engine is hard to start, check the fuel level and ensure it’s fresh. Verify the choke is in the correct position and the primer bulb is pressed the recommended number of times. Inspect the spark plug for cleanliness or wear, and ensure the air filter is clean or replaced if necessary. Check for loose connections or blockages in the fuel line. If issues persist, consult the manual for specific troubleshooting steps or consider servicing the mower. Always follow safety guidelines before attempting repairs.

Uneven Cutting Performance

If your Hyper Tough 20 Inch Lawn Mower is producing uneven cuts, ensure the blade is sharp and free of damage. Check the mowing deck for proper leveling, as an uneven deck can lead to inconsistent cutting. Verify that the tire pressure is correct, as low pressure may affect stability. Additionally, mow in consistent, overlapping passes to maintain an even height. If issues persist, consult the manual for blade sharpening or replacement instructions. Proper maintenance and adjustment can restore optimal cutting performance, ensuring a tidy and professional-looking lawn.

Overheating Issues

If your Hyper Tough 20 Inch Lawn Mower experiences overheating, check for blockages in the air filter or cooling vents, as debris can restrict airflow. Ensure the oil level is adequate, as low oil can cause the engine to overheat. Avoid mowing in extreme heat or for extended periods without breaks. Sharpen or replace a dull blade, as it can strain the engine. If overheating persists, consult the manual for guidance on cooling system maintenance or potential repairs. Regular checks and proper maintenance can prevent overheating and extend the mower’s lifespan.

Parts Diagram and Identification

The manual includes detailed diagrams to help users identify parts accurately, outlining components like the deck, engine, handles, and wheels with corresponding part numbers for reference.

Understanding the Parts Diagram

The parts diagram in the Hyper Tough 20 Inch Lawn Mower Manual is a visual guide that helps users identify and locate components such as the engine, deck, handles, and wheels. Each part is labeled with corresponding numbers, making it easier to reference during maintenance or repairs. This diagram ensures clarity and accuracy when ordering replacement parts or assembling the mower. By understanding the layout and function of each component, users can better navigate the manual and perform tasks efficiently. The detailed illustrations provide a clear overview, helping users familiarize themselves with the mower’s structure and operation.

Locating Parts by Number

The manual provides a detailed parts list with corresponding numbers, allowing users to easily identify and locate components. Each part, from the engine to the wheels, is assigned a unique number for quick reference. This numbering system ensures accuracy when ordering replacements or performing repairs. Users can cross-reference the parts diagram with the list to find exact locations and descriptions. This organized approach simplifies maintenance and reduces confusion, making it easier to keep the mower in optimal condition. The clear numbering system is a key feature of the manual, designed to enhance user experience and efficiency.

Safety Precautions

Always read and follow the manual’s safety guidelines, including warnings and symbols like DANGER and CAUTION, to ensure safe operation and prevent accidents while using the mower.

General Safety Guidelines

Always read and understand the manual before operating the mower. Wear protective gear like gloves and eyewear. Ensure the area is clear of debris and children. Never operate the mower while tired or under the influence of alcohol. Keep loose clothing tied back and avoid jewelry that could catch. Maintain a firm grip on the handles and walk, not run, while mowing. Keep children and pets at a safe distance. Never leave the mower unattended while it is running. Regularly inspect the mower for damage or wear and tear to ensure safe operation. Follow all safety symbols and instructions provided in the manual.

Warning Symbols and Their Meanings

The manual includes various warning symbols to ensure safe operation. A triangle with an exclamation mark indicates general warnings, such as hot surfaces or sharp edges. A circle with a slash through it signifies prohibited actions, like not using the mower in wet conditions. A hand symbol alerts users to potential cuts or burns. The warning symbols are accompanied by descriptions to clarify their meanings, ensuring users understand potential hazards. Familiarizing yourself with these symbols is crucial for safe and proper use of the Hyper Tough 20 Inch Lawn Mower.

Environmental Considerations

Adhering to eco-friendly practices, the manual emphasizes proper waste disposal and sustainable mowing habits, ensuring minimal environmental impact while maintaining your lawn efficiently.

Eco-Friendly Mowing Practices

Adopting eco-friendly mowing practices ensures minimal environmental impact while maintaining a healthy lawn. The Hyper Tough 20 Inch Lawn Mower Manual encourages users to follow sustainable habits, such as regular maintenance to optimize fuel efficiency and reduce emissions. Proper disposal of waste, including oil and grass clippings, is emphasized to prevent environmental contamination. Additionally, the manual suggests mowing practices that promote grass health, reducing the need for excessive watering or chemical treatments. By adhering to these guidelines, users can contribute to a greener, more sustainable lawn care routine.

Proper Disposal of Waste

Proper disposal of waste is crucial for environmental protection. The Hyper Tough 20 Inch Lawn Mower Manual emphasizes the importance of safely disposing of materials like oil, filters, and batteries. Always check local regulations for hazardous waste disposal options. Grass clippings and organic debris should be composted or bagged for municipal collection. Avoid dumping waste in waterways or natural areas. Recycle metals and plastics when possible. Proper disposal helps reduce environmental harm and ensures compliance with local laws. By following these guidelines, users can contribute to a cleaner, more sustainable environment while maintaining their lawn mower’s efficiency and longevity.

Comparing Different Models

The Hyper Tough 20 Inch Lawn Mower is available in gas and cordless models, offering unique features like a 159cc engine or a 40V brushless motor for tailored performance.

Differences Between Gas and Cordless Models

The Hyper Tough 20 Inch Lawn Mower is available in both gas and cordless versions, each offering distinct advantages. The gas model features a powerful 159cc engine, ideal for larger yards and tougher grass, while the cordless version uses a 40V brushless motor for quieter, emission-free operation. The gas model requires manual pull-cord starting and regular fuel maintenance, whereas the cordless model offers push-button convenience and lower upkeep. Both models share a 20-inch cutting deck and 3-in-1 functionality but cater to different user preferences and yard sizes, ensuring versatility for various landscaping needs.

Upgrading or Replacing Parts

Upgrading or replacing parts on your Hyper Tough 20 Inch Lawn Mower is straightforward with the manual’s detailed parts diagram. Ensure compatibility by referencing the model-specific part numbers, such as those for the HY5601050516002 model. The manual provides clear instructions for identifying and ordering replacement parts, ensuring optimal performance and longevity. For gas models, parts like the 159cc engine components can be sourced directly, while cordless models may require specific 40V battery or brushless motor replacements; Always use genuine or compatible parts to maintain warranty validity and safety standards, as outlined in the manual.

The Hyper Tough 20 Inch Lawn Mower Manual ensures optimal performance and longevity by providing comprehensive guidance on proper use, maintenance, and care for your mower.

Final Tips for Optimal Performance

For the best results with your Hyper Tough 20 Inch Lawn Mower, ensure regular maintenance, such as sharpening the blade and changing the oil. Store the mower in a dry, protected area during off-seasons to prevent rust and damage. Always use the recommended fuel type and follow the manual’s guidelines for fuel efficiency. Keep the cutting deck clean to maintain even performance and prevent clogging. Additionally, check and tighten loose bolts periodically to ensure stability and safety. By following these tips, you can extend the lifespan of your mower and achieve consistent, high-quality cutting results season after season.

Long-Term Maintenance for Durability

Regular cleaning of the mower deck and blades prevents rust and debris buildup, ensuring smooth operation. Lubricate moving parts annually to reduce friction and wear. Store the mower in a dry, protected area during winter, using a breathable cover to prevent moisture damage. Check and tighten all bolts and screws periodically to maintain structural integrity. Avoid exposing the mower to extreme temperatures or direct sunlight for extended periods. Properly drain fuel before long-term storage to prevent degradation and engine issues. These practices will help extend the lifespan of your Hyper Tough 20 Inch Lawn Mower and keep it performing efficiently for years.

Additional Resources

Access the Hyper Tough 20 Inch Lawn Mower manual PDF online for detailed instructions. Visit ManualsLib or the official Hyper Tough website for guides and support.

Downloading the Manual PDF

The Hyper Tough 20 Inch Lawn Mower manual PDF is readily available online. Visit the official Hyper Tough website or platforms like ManualsLib to download it. Simply search for the model number, such as HY5601050516002, and follow the on-screen instructions. The PDF manual includes detailed diagrams, assembly instructions, and troubleshooting tips. Ensure you download the correct version for your specific mower model. This resource is essential for understanding your mower’s features and maintaining it properly. Save the PDF for easy access and refer to it whenever needed for guidance.

Accessing Online Support

For the Hyper Tough 20 Inch Lawn Mower, online support is readily available. Visit the official Hyper Tough website or platforms like ManualsLib to access resources. These sites offer downloadable PDF manuals, troubleshooting guides, and FAQs. Additionally, interactive 3D instructions and video tutorials can be found to assist with assembly and maintenance. Online forums and customer service portals provide further assistance for specific queries. Ensure to use the correct model number, such as HY5601050516002, when searching for support materials. These resources help users resolve issues and optimize their mower’s performance effectively.

andersen 400 series window installation instructions

The Andersen 400 Series offers a versatile range of window styles, known for their durability, energy efficiency, and low-maintenance design. Proper installation is crucial to ensure optimal performance and longevity of these high-quality windows.

1.1 Overview of the Andersen 400 Series

The Andersen 400 Series is a popular choice for homeowners seeking durable, energy-efficient, and low-maintenance windows. Designed for both new construction and remodeling projects, this series offers a variety of styles, including double-hung, casement, awning, and gliding windows. Known for their sleek design and versatility, these windows feature Andersen’s exclusive Perma-Shield exterior cladding, which resists rot, decay, and insect damage. The series also includes triple-pane glass options for enhanced thermal performance, making them ideal for meeting stringent energy standards like ENERGY STAR v.7.0. With a focus on ease of installation and long-term durability, the Andersen 400 Series is a cost-effective solution for homeowners looking to upgrade their windows while maintaining aesthetic appeal and functionality.

1.2 Importance of Proper Installation

Proper installation of Andersen 400 Series windows is essential to ensure optimal performance, durability, and energy efficiency. Improper installation can lead to issues such as air leaks, water infiltration, and reduced structural integrity, which may void warranties. Andersen strongly recommends consulting with experienced contractors, architects, or structural engineers to handle the installation, especially for complex scenarios like impact-resistant glass units. Additionally, following the manufacturer’s guidelines and using the Andersen Installation Guide Configurator can help prevent operational problems and ensure compliance with local building codes. Safe lifting techniques and adequate manpower are also critical, as windows can be heavy and may cause injury or damage if mishandled. By adhering to proper installation practices, homeowners can enjoy the full benefits of their Andersen 400 Series windows for years to come.

Tools and Materials Needed

Essential tools include a measuring tape, level, drill, and screwdrivers. Required materials are flashing, shims, sealants, and fasteners. Ensure all items are readily available to streamline the installation process effectively.

2.1 Essential Tools for Installation

Installing Andersen 400 Series windows requires specific tools to ensure accuracy and safety. A measuring tape is crucial for precise measurements, while a level guarantees proper alignment. A drill and screwdrivers are necessary for securing the window unit. Additionally, shims are used for leveling, and a utility knife can help with flashing and weatherproofing materials. Safety gear, such as gloves and safety glasses, is essential to protect against potential hazards. Having a pencil and markers on hand will aid in marking surfaces and ensuring proper fit. Organize these tools beforehand to streamline the installation process. Refer to the official Andersen installation guide for any tool-specific recommendations. Proper tool preparation is key to a successful and efficient installation, minimizing delays and ensuring a professional finish.

2.2 Required Materials for the Project

Before starting the installation of Andersen 400 Series windows, gather all necessary materials to ensure a smooth process. Essential materials include high-quality flashing and weatherproofing materials to create a watertight seal around the window. Shims are required for leveling and aligning the window unit properly. Insulation materials, such as spray foam, are needed to fill gaps and enhance energy efficiency. Fasteners, including screws and nails, are necessary for securing the window to the rough opening. Additionally, weather-resistant sealants and caulk should be on hand to ensure proper sealing. Safety gear, such as gloves and goggles, is also important to protect yourself during the installation. Depending on the specific window type and local building codes, additional materials like structural supports or specialized fasteners may be required. Always refer to the official Andersen installation guide for material-specific recommendations tailored to your project.

Pre-Installation Preparation

Clear the installation site of debris and obstructions. Ensure all safety measures are in place, including proper scaffolding and fall protection. Inspect and prepare the rough opening, ensuring it is level, plumb, and sealed properly before proceeding with window installation.

3.1 Site Preparation and Safety Measures

Before beginning the installation of Andersen 400 Series windows, ensure the site is thoroughly prepared and all safety measures are in place. Clear the area of debris, tools, and obstructions to prevent tripping hazards. Wear appropriate personal protective equipment (PPE), including gloves, safety glasses, and a dust mask. Inspect the site for any potential hazards, such as uneven surfaces or loose materials, and address them immediately. Ensure proper scaffolding or ladders are in place and secure, following all local safety regulations. If working at heights, use fall protection equipment and maintain three points of contact when climbing. Designate a first aid kit and ensure someone on-site is trained in its use. Andersen strongly recommends consulting with a professional for complex installations, especially those involving structural support or high wind loads. Proper preparation and adherence to safety guidelines will help ensure a smooth and incident-free installation process.

3.2 Preparing the Rough Opening

Preparing the rough opening is a critical step in the installation of Andersen 400 Series windows. Ensure the opening is clean, dry, and free of debris. Verify that the rough opening dimensions match the window unit specifications, allowing for a 1/2-inch clearance on all sides for proper fitting. Check that the opening is square and level, as any irregularities can lead to installation issues. Inspect the surrounding area for rot, mold, or structural damage and address these problems before proceeding. Apply a layer of weather-resistant barrier material to the rough opening, ensuring it is properly sealed around the perimeter. Install flashing at the sill to direct water away from the window. Use shims to level the window unit if necessary. Andersen recommends consulting their installation guides or a professional for precise measurements and preparation. Proper preparation of the rough opening ensures a secure fit and optimal performance of the window. Always follow manufacturer guidelines for the best results.

Installation Steps for Andersen 400 Series Windows

Installing Andersen 400 Series windows involves preparing the opening, leveling the unit, securing it with fasteners, and sealing gaps. Follow Andersen’s guidelines for precise steps tailored to each window style.

4.1 Installing Double-Hung Windows

Installing Andersen 400 Series double-hung windows requires careful preparation and precise execution. Begin by ensuring the rough opening is properly prepared, with a level and plumb surface. Inspect the window unit for any damage before starting the installation.

Place the window into the opening, using shims to maintain proper alignment and level. Secure the window with fasteners, ensuring they are tightened evenly to avoid warping the frame. Install the operating sash next, making sure it moves smoothly within the tracks.

Seal all gaps around the window with appropriate insulation and flashing materials to prevent air leaks and water infiltration. Finally, test the window’s operation to ensure proper functionality. Always refer to Andersen’s official installation guide for detailed instructions tailored to your specific window model.

4.2 Installing Casement and Awning Windows

Installing Andersen 400 Series casement and awning windows involves precise steps to ensure proper functionality and sealing. Begin by preparing the rough opening, ensuring it is level, plumb, and free of debris. Position the window unit, aligning it with the opening, and use shims to stabilize it during installation.

Secure the window to the surrounding frame using the provided fasteners, tightening them evenly to avoid misalignment. For casement windows, attach the hinge side first, then the operable side, ensuring smooth operation. Awning windows are installed similarly, with the hinge at the top.

Install the operator and crank mechanism according to the manufacturer’s instructions to ensure proper opening and closing. Apply flashing around the perimeter to seal gaps and prevent water intrusion. Finally, test the window’s operation to confirm smooth movement and a secure seal. Always follow Andersen’s specific guidelines for casement and awning models to guarantee a successful installation.

4.3 Gliding Windows Installation Process

Installing Andersen 400 Series gliding windows requires careful preparation and execution to ensure smooth operation. Begin by ensuring the rough opening is level and free of obstructions. Place the window unit into the opening, aligning the track with the sill plate for proper fit.

Secure the window by fastening the sides to the surrounding frame using screws provided. Ensure the unit is plumb and level, adjusting shims as needed for stability. The track system is pre-assembled, so align it accurately with the window frame to avoid misalignment.

Install the rollers and gliding mechanism according to the manufacturer’s instructions, ensuring they move smoothly along the track. Seal all gaps with flashing and weatherproofing materials to prevent air leaks and water intrusion. Finally, test the window by sliding it back and forth to confirm effortless operation and a secure seal. Always refer to Andersen’s specific installation guide for gliding windows to ensure compliance with recommended practices and optimal performance.

Safety Considerations and Best Practices

Always wear proper safety gear, including gloves and safety glasses. Use safe lifting techniques and ensure enough manpower to handle heavy window units. Follow Andersen’s guidelines and manufacturer instructions to prevent injuries and damage.

5.1 General Safety Guidelines

Ensuring a safe working environment is crucial when installing Andersen 400 Series Windows. Wear protective gear such as gloves, safety glasses, and a dust mask. Clear the workspace of debris and tripping hazards. Use proper lifting techniques to avoid strain and injury, especially with heavy window units. Always follow Andersen’s installation instructions and consult professionals if unsure. Ensure proper ventilation when using power tools or adhesives. Keep children and pets away from the work area; Regularly inspect tools and equipment for damage. In case of an emergency, have a first-aid kit nearby. Remember, safety should never be compromised for efficiency. By adhering to these guidelines, you can safeguard yourself and others throughout the installation process.

5.2 Handling Heavy Window Units Safely

Handling heavy Andersen 400 Series Window units requires careful planning and execution to prevent injuries and damage. Always assess the weight of the window unit and gather enough people with sufficient strength to lift, carry, and install it safely. Use proper lifting techniques, bending at the knees and keeping the unit close to your body. Avoid lifting during extreme weather conditions, such as strong winds or rain, as this can increase the risk of accidents. Consider using lifting straps or dollies for added support and stability. Designate one person as the leader to coordinate the lifting process and ensure clear communication. Never lift windows with broken or damaged glass, as they may shatter and cause injury. Andersen strongly recommends following manufacturer guidelines and consulting professionals if unsure. By prioritizing safe handling practices, you can protect both the product and the installation team from potential harm.

Troubleshooting Common Installation Issues

Common issues during Andersen 400 Series window installation include fit, alignment, and sealing problems. Andersen provides detailed guides to check installations and prevent future issues. Refer to the Architect Detail File for specific solutions and ensure proper flashing and sealing techniques are followed to avoid water infiltration and performance issues. Addressing these problems early ensures long-term functionality and energy efficiency, aligning with Andersen’s quality standards and user expectations for durability and performance. Proper troubleshooting also involves consulting Andersen’s technical support or experienced professionals if issues persist, ensuring that all components are correctly installed and maintained according to the manufacturer’s instructions.

6.1 Addressing Fit and Alignment Problems

Fit and alignment issues are common during Andersen 400 Series window installation. Ensure the rough opening is square and properly sized. Use shims to level the window unit, checking with a level to confirm it’s plumb and level. Fasten the window securely, tightening screws evenly to avoid misalignment. If gaps exist, seal them with appropriate materials following Andersen’s guidelines. Consult professionals if issues persist, as proper fit is crucial for performance and durability.

6.2 Solving Sealing and Flashing Issues

Sealing and flashing issues can compromise the performance of Andersen 400 Series windows. Ensure proper flashing is installed around the window to prevent water intrusion. Flanges alone may not provide adequate sealing, so follow Andersen’s guidelines for additional sealing materials. Inspect the window unit for gaps or leaks, especially at the corners and edges. Apply a bead of compatible sealant around the perimeter before installing flashing. Use high-quality weatherproof materials to cover the window and integrate it with the surrounding wall. Refer to Andersen’s installation guides for specific flashing techniques. If water infiltration persists, check the flashing for damage or improper application. Addressing these issues promptly will ensure long-term durability and energy efficiency of your Andersen windows.

Post-Installation Maintenance and Care

Regular cleaning and inspections ensure the longevity of Andersen 400 Series windows. Clean glass surfaces with mild soap and water, and inspect frames for damage or wear. Lubricate hinges and locks annually for smooth operation.

7.1 Cleaning and Upkeep Tips

Regular cleaning is essential to maintain the appearance and functionality of Andersen 400 Series windows. Use a mild soap solution and water to clean glass surfaces, avoiding harsh chemicals that could damage the glass or frames. For frames, a soft cloth and water are sufficient, while a silicone-based lubricant can be applied to hinges and locks to ensure smooth operation. Avoid using abrasive materials that might scratch the finish.

Inspect weatherstripping annually to ensure proper sealing and energy efficiency. Replace any damaged or worn-out components promptly. For Perma-Shield cladding, wipe down with a damp cloth to maintain its protective finish. Regular upkeep prevents dirt buildup and extends the lifespan of your windows.

Clean screens by removing and rinsing them with water. Allow them to dry before reinstalling. Address any paint or stain touch-ups on wood components as needed. Schedule seasonal checks to ensure all parts are functioning correctly, especially before extreme weather conditions.

7.2 Ensuring Long-Term Performance

Proper maintenance and care are crucial for ensuring the long-term performance of Andersen 400 Series windows. Regular inspections of the window frames, sashes, and hardware can help identify and address potential issues before they escalate. Check for signs of wear, such as cracks in the frame or damage to the weatherstripping, and repair or replace these components as needed.

Weatherstripping plays a key role in maintaining energy efficiency and preventing air leaks. Inspect it annually and replace it if it shows signs of deterioration. Lubricate moving parts, such as hinges and locks, with a silicone-based lubricant to ensure smooth operation. This helps extend the lifespan of the mechanisms and prevents squeaking or sticking.

Protecting the windows from extreme weather conditions is also essential. Ensure proper flashing and sealing around the window openings to prevent water infiltration, which can damage the surrounding structure. By following these steps, you can maintain the durability, energy efficiency, and aesthetic appeal of your Andersen 400 Series windows for years to come.

Proper installation and maintenance of Andersen 400 Series windows ensure long-term performance and energy efficiency. Always follow manufacturer guidelines and consult professionals for complex tasks to achieve optimal results and durability.

8.1 Summary of Key Installation Steps

Installing Andersen 400 Series windows requires careful planning and execution. Begin with site preparation, ensuring the area is clear and safe. Prepare the rough opening by verifying dimensions and ensuring it is level and secure. For double-hung windows, attach the sill and side jambs, then insert the window unit, using shims to align it properly. Secure the window with screws, ensuring it is plumb and level. For casement and awning windows, mount the hinges and crank mechanism before installing the unit. Apply flashing and sealing materials around the perimeter to ensure weather tightness. Double-check all fasteners and ensure proper operation. Finally, inspect the installation for any gaps or alignment issues. Refer to specific guides for detailed instructions tailored to your window type. Proper installation ensures optimal performance, energy efficiency, and longevity of your Andersen windows.

8.2 Final Tips for a Successful Project

For a successful Andersen 400 Series window installation, always follow manufacturer guidelines and safety protocols. Ensure all tools and materials are readily available to avoid delays. Double-check measurements and alignment before securing the window unit. Use proper lifting techniques to handle heavy windows, and consider enlisting help to prevent injury or damage. Apply recommended flashing and sealing methods to ensure weather tightness and energy efficiency. Regularly inspect the installation for any gaps or misalignments and address them promptly. Familiarize yourself with Andersen’s warranty and maintenance requirements to uphold product performance. Consulting Andersen’s support resources or an experienced installer can provide additional guidance. By adhering to these tips, you can achieve a professional-grade installation that enhances your home’s functionality and aesthetic appeal while ensuring long-term satisfaction with your Andersen windows.

story of the eye pdf

Georges Bataille’s Story of the Eye is a notoriously provocative novel‚ exploring themes of eroticism and transgression․ Its controversial content has led to various digital adaptations‚ including PDF versions‚ which are widely available online despite challenges in digitizing such explicit material․

Overview of Georges Bataille and His Work

Georges Bataille was a French philosopher‚ writer‚ and literary critic known for his provocative and transgressive works․ Born in 1897‚ Bataille explored themes of eroticism‚ death‚ and the sacred‚ often challenging societal norms․ His writing blended philosophy‚ poetry‚ and fiction‚ creating a unique intellectual legacy․ Story of the Eye‚ published in 1928‚ is his most notorious work‚ blending explicit sexuality with philosophical inquiry․ Bataille’s influence extends beyond literature‚ impacting postwar French philosophy and surrealism․ His work often examines the interplay between excess‚ taboo‚ and human existence‚ making him a pivotal figure in 20th-century thought․ Despite controversy‚ Bataille remains a significant voice in exploring the boundaries of art‚ morality‚ and consciousness․

The Historical Context of the Novel

Story of the Eye‚ written by Georges Bataille in 1928‚ emerged during a period of cultural and intellectual upheaval in France․ The novel reflects the influence of surrealism‚ which was gaining prominence at the time‚ emphasizing the subconscious and the irrational․ Bataille’s work was also shaped by his interests in philosophy‚ particularly the ideas of Hegel and Nietzsche‚ as well as his fascination with the sacred and the profane․ The interwar period provided a backdrop of social and moral change‚ allowing for more experimental and transgressive literature․ Bataille’s exploration of taboo themes resonated with the era’s questioning of traditional values‚ making Story of the Eye a product of its time and a precursor to later avant-garde movements․

Why “Story of the Eye” is Significant in Literary History

Story of the Eye holds a pivotal place in literary history for its unflinching exploration of eroticism and transgression‚ challenging traditional norms of both literature and morality․ Georges Bataille’s novel is celebrated for its bold narrative style‚ blending surrealism with philosophical introspection․ It influenced later avant-garde movements and remains a cornerstone of transgressive literature; The novel’s graphic content sparked controversy‚ yet it also prompted critical discussions about the boundaries of art and the human condition․ Its enduring relevance is evident in its adaptation into various digital formats‚ including PDFs‚ ensuring its accessibility to modern readers․ Story of the Eye continues to provoke thought‚ solidifying its status as a groundbreaking work in twentieth-century literature․

Themes and Motifs in “Story of the Eye”

The novel explores eroticism‚ transgression‚ and surrealism‚ with motifs like “The Eye” symbolizing voyeurism and obsession‚ blending philosophical depth with provocative imagery․

Exploration of Eroticism and Transgression

Georges Bataille’s Story of the Eye delves into explicit eroticism and transgression‚ blending sex‚ violence‚ and surreal imagery․ The novel’s graphic content‚ including scenes of sexual experimentation and bodily fluids‚ challenges societal norms․ Through metaphors like urine and eggs‚ Bataille explores themes of taboo and excess‚ creating a visceral narrative that provokes both discomfort and fascination․ The merging of pleasure and pain reflects Bataille’s philosophical interest in the limits of human experience․ While controversial‚ the novel’s exploration of transgression serves as a critique of moral boundaries‚ offering a raw‚ unfiltered portrayal of desire and its darker dimensions․ This approach has sparked debates about the role of erotic literature in questioning cultural and ethical norms․

The Role of Surrealism in the Narrative

Georges Bataille’s Story of the Eye is deeply influenced by surrealist principles‚ blending dream-like imagery with unsettling eroticism․ The narrative’s fluid‚ fragmented structure mirrors surrealist techniques‚ creating a sense of disorientation․ Through vivid‚ often fantastical descriptions‚ Bataille explores the subconscious‚ merging sexual desire with violent imagery․ This surrealist approach allows the novel to transcend conventional storytelling‚ immersing readers in a world where reality and fantasy blur․ The PDF versions of the book preserve this surreal aesthetic‚ maintaining the text’s provocative and enigmatic quality․ By embracing surrealism‚ Bataille challenges rationality and societal norms‚ offering a narrative that is both visually striking and philosophically charged․ This blending of the bizarre and the erotic underscores the novel’s enduring impact on literary and artistic movements․

Religious and Philosophical Undertones

Beneath its erotic surface‚ Story of the Eye is rich with religious and philosophical themes․ Bataille‚ influenced by figures like Hegel and Nietzsche‚ explores ideas of sacrifice‚ transgression‚ and the sacred․ The novel’s PDF versions highlight these undertones‚ revealing a complex interplay between blasphemy and spirituality․ The characters’ actions often mirror ritualistic practices‚ blurring the lines between sin and redemption․ Bataille’s philosophy of “base materialism” is evident‚ challenging traditional notions of the divine․ The text’s digital formats ensure these profound themes remain accessible‚ inviting readers to reflect on the intersection of religion‚ philosophy‚ and human desire․ This depth transforms the novel into more than mere erotica‚ offering a philosophical journey into the heart of existence․

The Concept of “The Eye” as a Symbol

The “eye” in Bataille’s novel is a multifaceted symbol‚ representing both voyeuristic desire and transcendence․ It signifies the gaze that objectifies and consumes‚ yet also embodies insight and revelation․ The PDF versions of the text emphasize the eye’s recurring imagery‚ linking it to themes of control‚ power‚ and spiritual awakening․ The eye becomes a metaphor for the self‚ exploring boundaries between the inner and outer worlds․ Its presence throughout the narrative underscores the tension between destruction and creation‚ mirroring Bataille’s philosophical ideas on excess and taboo․ This symbolic richness invites readers to interpret the eye as both a literal and metaphorical gateway to understanding the human condition‚ making it a central element in the novel’s enduring impact․

Literary Analysis and Criticism

Georges Bataille’s Story of the Eye is a foundational text in transgressive literature‚ blending eroticism‚ surrealism‚ and philosophical inquiry․ Its controversial themes have sparked intense academic debate‚ with scholars exploring its subversion of societal norms and its influence on modern literary movements․

Critical Reception of the Novel

Georges Bataille’s Story of the Eye has garnered both acclaim and condemnation since its publication in 1928․ Critics often praise its bold exploration of eroticism‚ transgression‚ and surrealism‚ while others criticize its graphic content and perceived misogyny․ The novel’s blend of philosophical introspection and explicit sexuality has made it a focal point of academic debate․ Feminist scholars‚ in particular‚ have scrutinized its portrayal of women‚ arguing that it objectifies female bodies․ Despite these criticisms‚ the work is widely regarded as a seminal text in transgressive literature‚ influencing later writers and artists․ Its controversial nature has ensured its enduring relevance in discussions of literary provocation and cultural boundaries․ The PDF versions of the novel have further expanded its accessibility‚ sparking new waves of critical engagement․

Feminist Critiques of “Story of the Eye”

Feminist scholars have sharply criticized Story of the Eye for its depiction of women‚ arguing that the novel objectifies female bodies and perpetuates misogynistic themes․ Critics contend that Bataille’s exploration of eroticism often reduces women to mere objects of male desire‚ reinforcing patriarchal norms․ The graphic sexual content and violent imagery have been interpreted as dehumanizing‚ particularly in scenes involving female characters․ Some feminists argue that the novel’s transgressive nature overshadows its potential for meaningful critique of gender roles․ Despite these criticisms‚ the work remains a subject of academic analysis‚ with some exploring its subversive potential within feminist theory․ The availability of Story of the Eye in PDF formats has made it more accessible‚ leading to ongoing debates about its place in feminist literary scholarship․

Connection to Georges Bataille’s Other Works

Story of the Eye aligns with Georges Bataille’s broader themes of transgression‚ eroticism‚ and philosophical inquiry‚ evident in his other works like Blue of Noon and My Mother․ The novel’s exploration of excess and taboo reflects Bataille’s consistent preoccupation with pushing boundaries‚ both in literature and human experience․ Similar to his essay The Solar Anus‚ Story of the Eye employs surreal imagery to challenge conventional norms․ Bataille’s work often blurs the lines between pornography and philosophy‚ a duality present throughout his oeuvre․ The availability of Story of the Eye in PDF formats has facilitated its comparison with his other writings‚ revealing a coherent intellectual trajectory focused on transgression and the subversion of societal constraints․

Psychological and Sociological Interpretations

Story of the Eye invites profound psychological and sociological analysis‚ particularly through its exploration of transgression‚ taboo‚ and the blurring of reality and fantasy․ The novel’s graphic content and surreal imagery provoke reflections on the human psyche’s darker corners‚ such as obsession‚ desire‚ and the pursuit of extremes․ Sociologically‚ it critiques societal norms by depicting characters who reject conventional morality‚ embracing instead a world of erotic and violent excess․ The PDF versions of the book have made these themes more accessible for modern readers‚ enabling deeper exploration of how Bataille’s work challenges psychological and social boundaries․ Its controversial nature continues to spark debates about the limits of literature and its role in questioning societal structures and individual psychological complexities․

Personal and Cultural Impact

The availability of Story of the Eye in PDF has amplified its cultural impact‚ spreading its provocative themes and influencing modern literature and art‚ solidifying its notorious reputation․

Georges Bataille’s Reputation as a Provocative Writer

Georges Bataille’s reputation as a provocative writer is deeply intertwined with the controversy surrounding Story of the Eye․ The novel’s explicit exploration of eroticism‚ violence‚ and transgression shocked audiences‚ solidifying his image as a literary enfant terrible․ Bataille’s willingness to push boundaries and challenge societal norms earned him both admiration and criticism․ His work‚ particularly Story of the Eye‚ has been seen as a blend of pornography and philosophy‚ making him a polarizing figure in literary circles․ The availability of the novel in PDF format has further amplified its reach‚ ensuring Bataille’s provocative legacy endures in modern culture․

The Controversy Surrounding the Novel’s Content

Story of the Eye has long been a source of controversy due to its explicit and graphic depictions of sexuality‚ violence‚ and taboo themes․ The novel’s blending of eroticism with transgressive acts shocked readers‚ leading to widespread criticism and moral outrage․ Its content‚ including scenes involving bodily fluids and voyeuristic fantasies‚ has been deemed pornographic by some‚ while others argue it is a profound philosophical exploration․ The book’s notoriety was further amplified by its initial banning in France‚ cementing its reputation as a daring and provocative work․ Even today‚ debates persist over whether the novel crosses the line into obscenity or remains a groundbreaking work of literary art․

Influence on Modern Literature and Art

Georges Bataille’s Story of the Eye has left an indelible mark on modern literature and art․ Its exploration of surrealism‚ eroticism‚ and transgression has inspired countless writers‚ artists‚ and filmmakers․ The novel’s themes of pushing boundaries and challenging societal norms have resonated with creators seeking to explore the darker aspects of human experience․Authors like Pierre Klossowski and Maurice Blanchot have drawn inspiration from Bataille’s work‚ while visual artists have used the novel’s imagery to create provocative pieces․ Additionally‚ the book’s influence can be seen in films that blend sexuality with surreal narratives‚ further cementing its legacy as a pioneering work in both literary and artistic circles․

Adaptations and Interpretations in Film

Story of the Eye has inspired various film adaptations and artistic interpretations‚ reflecting its enduring influence․ Filmmakers like Andrew Repasky McElhinney have produced works based on the novel‚ blending its themes of sensuality and violence․ The narrative’s surreal and transgressive elements have also influenced visual artists‚ who draw inspiration from its vivid imagery․ Despite the challenges of translating such explicit content‚ the novel’s provocative nature continues to attract creators seeking to explore the boundaries of art and expression․

The “Story of the Eye” PDF

Story of the Eye is widely available in PDF format‚ with multiple digitized versions accessible online․ Its provocative content poses challenges for digital distribution platforms․

How to Create a PDF Version of the Book

Creating a PDF of Story of the Eye involves using software like Adobe Acrobat or Microsoft Word․ Convert the text into a digital document‚ ensuring formatting is preserved․ Tools like Google Docs or online converters can also be utilized for this process․ Additionally‚ existing PDFs are available for download‚ offering a convenient alternative for readers․ Ensure compliance with copyright laws when sharing or distributing the PDF․ The process is straightforward‚ allowing easy access to Bataille’s work in a digital format․

Availability of “Story of the Eye” in Digital Formats

Story of the Eye is widely available in digital formats‚ including PDF‚ e-book‚ and online versions․ Platforms like Scribd‚ Google Docs‚ and various online archives host digitized copies of the novel․ The text has been scanned and shared by multiple sources‚ ensuring easy access for readers․ Many websites offer free downloads‚ though some may require subscription or payment․ The PDF version‚ in particular‚ has been popular due to its portability and readability across devices․ Despite its controversial nature‚ the book’s digital presence remains strong‚ catering to both academic and casual readers interested in Bataille’s provocative work․ Digital formats have made this seminal text more accessible than ever‚ ensuring its enduring relevance in modern literature․

Challenges in Digitizing Controversial Content

Digitizing Story of the Eye presents unique challenges due to its graphic and controversial nature․ Many platforms restrict or remove content deemed explicit or offensive‚ limiting its availability․ Despite this‚ the novel’s PDF versions circulate widely‚ often shared through less regulated online spaces․ The book’s notoriety attracts both academic and casual readers‚ ensuring its persistence in digital formats․ However‚ the ethical and legal complexities of hosting such material pose ongoing challenges for distributors and archivists․ Balancing free access with content policies remains a significant issue in preserving Bataille’s work digitally․ Despite these hurdles‚ Story of the Eye continues to be a focal point in discussions about censorship‚ artistic freedom‚ and the role of controversial literature in the digital age․

Posted in PDF