singer model 9410 instruction manual

Singer 9410 Sewing Machine: A Comprehensive Guide

Navigating the world of the Singer 9410 often begins with securing a reliable instruction manual. Replacements are available as PDF downloads or on CDs, offering precise scans of original documents.

Finding a functional manual is crucial, as some online sources yield blank pages. Illustrated parts manuals, also in PDF format, are readily accessible for detailed machine understanding.

The Singer 9410 sewing machine represents a unique offering within the Singer lineup, particularly noted for its adaptability to users with special needs and physical limitations. This model isn’t just a standard sewing machine; it incorporates an air transducer feature, allowing operation via breath control – a significant advantage for individuals facing dexterity challenges. Consequently, locating a comprehensive instruction manual is paramount for both typical users and those leveraging its specialized capabilities.

However, acquiring a suitable manual can present hurdles. While numerous sources advertise Singer 9410 instruction manuals, quality and completeness vary considerably. Some readily available downloads, often found through online searches, unfortunately contain only blank pages, rendering them useless. Genuine, high-resolution scans of the original Singer manual are available, often distributed on CDs in PDF format, ensuring an accurate reproduction of the original documentation. These meticulously prepared manuals are a far cry from simple Xerox copies, offering clarity and detail crucial for understanding the machine’s operation and maintenance.

Understanding the nuances of the 9410, including threading, bobbin winding, stitch selection, and troubleshooting, relies heavily on a dependable guide. The availability of both instruction and illustrated parts manuals is vital for maximizing the machine’s potential and ensuring long-term usability.

Understanding the Machine’s Unique Features

The Singer 9410 distinguishes itself primarily through its innovative air transducer system, a feature specifically designed to accommodate users with limited physical dexterity. This allows operation of the machine using breath control, bypassing the need for traditional hand and foot operation. A detailed instruction manual is therefore essential, not only for standard sewing functions but also for understanding and calibrating this unique system.

Beyond the air transducer, the 9410’s functionality mirrors many conventional Singer models, encompassing a range of stitch options and adjustable settings. However, the manual’s value lies in clearly explaining how these features interact with the air control system. Successfully utilizing the 9410 requires a thorough grasp of both the sewing mechanics and the nuances of breath-activated operation.

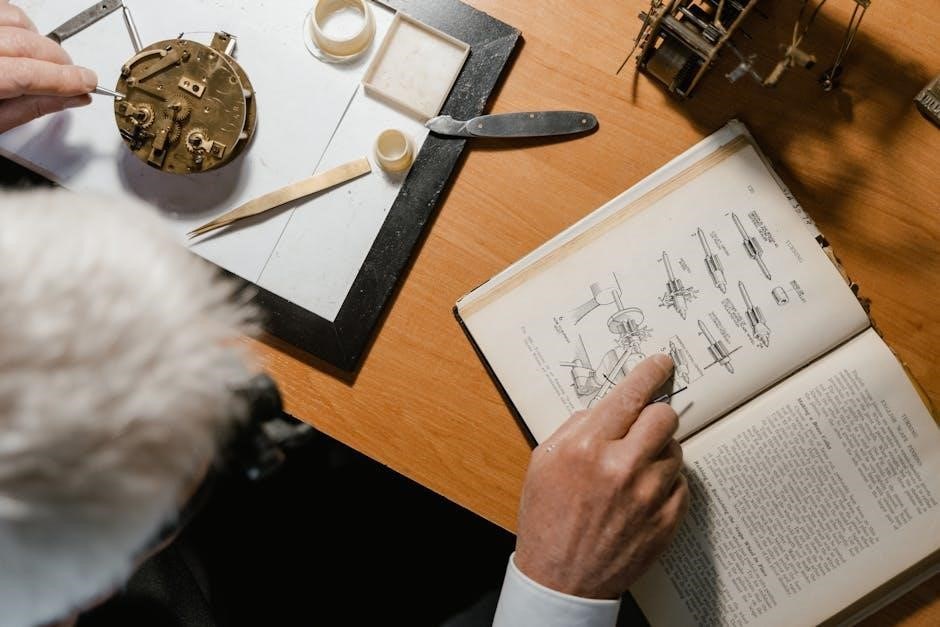
Illustrated parts manuals become particularly crucial when servicing or repairing the air transducer component. Identifying and replacing specific parts necessitates a visual guide, supplementing the textual instructions. A complete set of manuals – instruction and parts – unlocks the full potential of this specialized sewing machine, ensuring accessibility and longevity for its users.

Availability of Instruction Manuals

Securing a Singer 9410 instruction manual requires diligent searching, as original copies are becoming increasingly scarce. Fortunately, several avenues exist for obtaining one. Replacement manuals are readily available for purchase online, often offered as downloadable PDF files or delivered on a CD. Vendors like PDfmanualsdownload specialize in providing these resources, promising high-resolution scans replicating the original documentation.

However, caution is advised when sourcing online; Some searches yield incomplete or even blank PDF files, highlighting the importance of choosing reputable suppliers. The availability of a complete manual is paramount, encompassing both operational instructions and parts diagrams.

While finding a pristine, original manual can be challenging, reproduction options offer a viable alternative. These are often presented as digitally scanned copies, ensuring accuracy and readability. Prioritizing vendors who explicitly state their manuals are professionally scanned, rather than simple Xerox copies, guarantees a higher quality resource for operating and maintaining this unique sewing machine.

Digital Manuals: PDF Formats and Sources

The Singer 9410 instruction manual is most commonly found in PDF format, offering convenient accessibility and portability. These digital versions are typically created through professional, high-resolution scanning of original manuals, aiming for an exact duplicate of the printed document. This ensures clarity and detail for users relying on digital instructions.

Several online platforms and vendors specialize in providing these PDF manuals. PDfmanualsdownload is specifically mentioned as a source, offering replacement manuals for the 9410 model. It’s crucial to verify the completeness of the PDF before purchase, as some downloads have been reported as containing only blank pages – a result of flawed searches or unreliable sources.

PDF format allows for easy viewing on various devices, including computers, tablets, and smartphones. The availability of illustrated parts manuals in PDF format is also noteworthy, providing detailed diagrams for repairs and maintenance. Always prioritize sources guaranteeing a fully functional and accurately scanned PDF manual for optimal usability.

Physical Manuals: Original vs. Reproduction

For those preferring a tangible resource, Singer 9410 instruction manuals exist as both original editions and reproductions. Original manuals, while offering a vintage authenticity, can be difficult to find in good condition and often command a higher price due to their rarity. Their age may also result in faded print or wear and tear, potentially hindering readability.

Reproduction manuals, frequently available on CD in PDF format intended for printing, present a more accessible alternative. These aren’t simple Xerox copies; instead, they are created using professional, high-resolution scanning techniques to precisely replicate the original manual’s content. This ensures a clear and accurate representation of the original instructions.

When considering a reproduction, verifying the scanning quality is paramount. A well-executed reproduction will mirror the original’s detail, making it a practical and reliable substitute. While originals hold collector’s value, reproductions offer a cost-effective and readily available solution for everyday use and machine operation.

Illustrated Parts Manuals: Importance and Access

An Illustrated Parts Manual is an invaluable resource for Singer 9410 owners, extending beyond the standard instruction manual. While the instruction manual guides operation, the parts manual details every component of the machine, crucial for repairs and maintenance. Identifying the correct part number is simplified with clear diagrams, preventing incorrect replacements and ensuring proper functionality.

Accessing this manual is often achieved through digital formats, specifically PDF versions available on CDs. These digital copies allow for easy searching and zooming, facilitating precise part identification. Online marketplaces frequently list these manuals, offering convenient access for those needing to restore or repair their Singer 9410.

Having an illustrated parts manual empowers owners to undertake more complex repairs independently, reducing reliance on professional servicing. It’s a vital tool for preserving the longevity of this sewing machine, ensuring continued operation for years to come.

Common Issues and Troubleshooting

While the Singer 9410 is a robust machine, certain issues frequently arise. A primary concern reported by users is tension problems, often manifesting as uneven stitches despite the machine seemingly operating correctly. Troubleshooting typically involves re-threading both the upper and lower threads, and verifying correct bobbin insertion.

Access to a comprehensive instruction manual, or even better, an illustrated parts manual, becomes critical when diagnosing more complex problems. These manuals aid in identifying potential mechanical faults or worn components. Owners have reported success in resolving issues by carefully following the manual’s guidance on cleaning and lubrication.

Beyond mechanical issues, understanding the machine’s specific needs – particularly regarding its air transducer for users with special needs – is vital. A well-maintained manual provides the necessary information to address these unique operational aspects, ensuring optimal performance and longevity.

Tension Problems: A Frequent Concern

Tension issues are overwhelmingly the most reported problem with the Singer 9410, often presenting as looping stitches or thread breakage. A detailed instruction manual is paramount for correctly diagnosing and resolving these imbalances. The manual guides users through the proper threading procedure for both the upper thread and the bobbin, emphasizing the importance of each step.

Incorrect threading is frequently the root cause, but the manual also highlights the need to check the bobbin case for lint and debris. Adjusting the tension dial, as illustrated in the manual, is another crucial step. It’s important to make small adjustments and test the stitch after each change.

Furthermore, the manual stresses the use of appropriate thread weight and needle size for the fabric being used. Ignoring these recommendations can exacerbate tension problems. A clear understanding, gained from the manual, is key to achieving consistently balanced stitches.

Machine Operation Basics

The Singer 9410 instruction manual serves as the foundational guide for understanding its core functionalities. It begins with a detailed explanation of the machine’s components, labeling each part for easy identification. Mastering these basics is crucial before attempting any sewing project.

The manual meticulously details the process of winding the bobbin, a fundamental skill for continuous sewing. It illustrates the correct path for the thread and emphasizes the importance of even winding. Following this, the manual guides users through the bobbin insertion process, ensuring it’s properly seated within the machine.

Threading the upper thread is another key operation covered extensively. Clear diagrams demonstrate the precise route the thread must take, passing through all tension discs and guides. The manual also explains the foot pedal’s role in speed control, allowing for precise stitching.

Threading the Singer 9410

The Singer 9410 instruction manual dedicates significant detail to the threading process, recognizing it as a cornerstone of successful operation. It begins by illustrating the spool pin placement and the initial thread guide. Following this, the manual meticulously charts the thread’s path through the tension assembly, emphasizing the importance of securing the thread firmly within each disc.

Clear diagrams showcase the thread’s journey down to the take-up lever, highlighting its crucial role in stitch formation. The manual then guides the user through threading the needle itself, offering tips for easier insertion, particularly with finer threads. It stresses the importance of using the correct needle size for the fabric being used.

Proper threading ensures balanced tension and prevents skipped stitches. The manual often includes troubleshooting tips specifically related to threading errors, such as ensuring the thread is fully seated in each guide. A correctly threaded machine is the foundation for quality sewing.

Bobbin Winding and Insertion

The Singer 9410 instruction manual provides a detailed walkthrough of bobbin winding, starting with spool placement and thread guidance to the bobbin winder tension disc. It emphasizes the importance of consistent, even winding to ensure proper stitch quality. Diagrams clearly illustrate the bobbin’s placement on the winder spindle and the engagement of the winding mechanism.

Following winding, the manual meticulously details bobbin insertion. It showcases the correct orientation of the bobbin within the bobbin case, stressing the thread path through the tension spring. The manual highlights the importance of a smoothly moving bobbin, free from obstructions, for consistent tension.

Proper bobbin insertion is critical for balanced stitches. Troubleshooting sections address common issues like uneven winding or thread bunching, offering solutions to ensure optimal performance. A correctly wound and inserted bobbin is fundamental to achieving professional-looking results with the Singer 9410.

Stitch Selection and Adjustment

The Singer 9410 instruction manual dedicates significant attention to stitch selection, outlining each stitch’s purpose and ideal application. It details how to navigate the stitch selection dial, clearly illustrating the corresponding stitch patterns. The manual emphasizes understanding stitch length and width adjustments for varied fabric types and desired effects.

Adjustment guidance is comprehensive, explaining how to modify settings for optimal results. Diagrams showcase the impact of different stitch lengths on fabric appearance and durability. The manual also covers zigzag stitch width adjustments, crucial for finishing raw edges and creating decorative elements.

Troubleshooting sections address common stitch issues, such as skipped stitches or uneven tension, providing solutions related to stitch selection and adjustment. Mastering these controls unlocks the full creative potential of the Singer 9410, allowing for precise and customized sewing projects.

Foot Pedal Operation and Speed Control

The Singer 9410 instruction manual provides detailed guidance on utilizing the foot pedal for precise speed control. It explains the correlation between pedal pressure and sewing speed, emphasizing gentle pressure for delicate fabrics and increased pressure for heavier materials. The manual illustrates proper foot positioning for smooth, consistent operation.

Understanding speed control is vital for achieving professional-looking results. The manual advises beginners to start with slow speeds to gain control and gradually increase as confidence grows. It also addresses potential issues like jerky movements, linking them to inconsistent pedal pressure or improper technique.

Troubleshooting sections offer solutions for unresponsive pedals or erratic speed fluctuations. The manual stresses the importance of a clean, unobstructed pedal area for optimal performance. Mastering foot pedal operation unlocks the Singer 9410’s full potential, enabling precise and efficient sewing.

Maintenance and Cleaning

The Singer 9410 instruction manual dedicates significant attention to routine maintenance and cleaning procedures. It emphasizes the importance of regular cleaning to prevent lint buildup, which can impede performance and cause mechanical issues. Detailed diagrams illustrate how to access and clean critical areas, including the bobbin case and feed dogs.

Lubrication is another key aspect of maintenance, with the manual specifying appropriate oil types and application points. It cautions against over-oiling, which can attract dust and create further problems. The manual provides a schedule for lubrication, based on usage frequency.

Preventative maintenance extends the machine’s lifespan and ensures consistent stitch quality. The manual also covers basic troubleshooting steps for common issues, such as thread jams and needle breakage, often stemming from inadequate cleaning or lubrication. Following these guidelines guarantees optimal performance and longevity.

Lubrication Guidelines for the 9410

The Singer 9410 instruction manual stresses the critical role of proper lubrication for smooth operation and longevity. It details specific oiling points within the machine, including the motor, gears, and moving linkages. The manual explicitly advises against using excessive oil, as this attracts lint and debris, ultimately hindering performance.

Recommended oil types are clearly stated, typically a high-quality sewing machine oil. The manual illustrates the correct application method, often using an oiler to precisely target key areas. It also outlines a lubrication schedule, varying based on the machine’s usage frequency – more frequent use necessitates more frequent oiling.

Ignoring lubrication guidelines can lead to increased friction, wear and tear, and eventual mechanical failure. The manual emphasizes that regular, careful lubrication is a preventative measure, ensuring consistent stitch quality and extending the life of the Singer 9410.

Special Needs and Air Transducers

The Singer 9410 distinguishes itself with a unique feature catering to individuals with specific physical limitations – an air transducer capability. The instruction manual, while primarily focused on standard operation, acknowledges this specialized functionality. This allows operation via air pressure, rather than traditional foot pedal control.

The manual details how to connect and calibrate the air transducer, ensuring responsive and accurate sewing. It’s noted as a valuable adaptation for those with limited hand or leg strength, or other mobility challenges. The system effectively translates gentle puffs of air into precise sewing movements.

While detailed setup instructions are limited, the manual points towards specialized resources for optimal configuration. This feature highlights the Singer 9410’s adaptability and commitment to inclusivity, offering a sewing solution for a wider range of users. It’s a testament to thoughtful design addressing diverse needs.

Resources for Repair and Support

Securing a Singer 9410 instruction manual is often the first step in addressing repair needs, but further support resources are frequently necessary. While Singer’s official website may have limited direct support for this older model, a thriving community exists online;

Numerous sewing machine repair forums and Facebook groups are dedicated to vintage Singer machines, including the 9410. These platforms offer invaluable troubleshooting advice, parts sourcing assistance, and shared experiences from fellow enthusiasts. Many skilled technicians also frequent these spaces.

For replacement parts, online retailers specializing in vintage sewing machine components are essential. SpeedyEquipment and PDFmanualsdownload are examples of vendors offering manuals and potentially parts. Local sewing machine repair shops, even if not specializing in Singer, may also be able to assist with diagnosis and repair. Remember to consult the illustrated parts manual when ordering components to ensure compatibility.

Where to Find Replacement Parts

Locating replacement parts for the Singer 9410 can require some dedicated searching, given its age; While Singer no longer directly supports this model with readily available parts, several avenues remain open for resourceful owners.

Online marketplaces like eBay frequently list both new-old-stock (NOS) and used parts salvaged from donor machines. Specialized vintage sewing machine retailers, such as SpeedyEquipment and PDFmanualsdownload, are also excellent sources. Always verify the part number using the illustrated parts manual before purchasing.

Local sewing machine repair shops may have a stock of common parts or be able to source them through their networks. Don’t hesitate to inquire, even if they don’t specialize in vintage Singers. Consider joining online forums and groups dedicated to vintage sewing machines; members often trade or sell parts amongst themselves. Patience and persistence are key to finding the specific components needed to restore your 9410.

haynes 30043 free pdf

Haynes 30043 Free PDF: A Comprehensive Guide

Haynes manuals, including 30043 for Ram Pick-ups (2009-2018), are sought after in digital format, with catalogs from 2019 and 2020 listing availability.

Accessing these resources digitally offers convenience, though considerations regarding legality and reliable sources are paramount for users seeking a free PDF version.

What is Haynes 30043?

Haynes 30043 is a comprehensive automotive repair manual specifically designed for Ram Pick-up trucks manufactured between 2009 and 2018. This manual, detailed in the Haynes catalogs of 2019 and 2020, provides detailed guidance for both amateur mechanics and professionals undertaking repairs and maintenance.

It covers a broad spectrum of procedures, from routine servicing like oil changes and filter replacements to more complex tasks such as engine and transmission overhauls. The manual aims to empower owners to perform many repairs themselves, saving on labor costs and gaining a deeper understanding of their vehicle.

Notably, the Haynes catalog specifies that 30043 doesn’t include information specific to all variations within the Ram Pick-up range, and it also references a related “Techbook Series” for expanded details. The author, Sean Lerwill, is a recognized name within Haynes publications, known for his clear and concise writing style.

Vehicle Coverage: Ram Pick-ups (2009-2018)

Haynes 30043 provides detailed repair information for Ram Pick-up trucks spanning the model years 2009 through 2018. This coverage encompasses a wide range of Ram 1500, 2500, and 3500 series vehicles produced during this period. However, it’s crucial to note, as indicated in the Haynes catalog listings, that the manual doesn’t cover every specific variation within this range.

Owners should verify compatibility with their exact model and engine configuration. The manual’s scope is clearly defined in the Haynes documentation, and supplemental information may be found within the associated “Techbook Series” for more specialized models.

The 2019 and 2020 Haynes catalogs both list this coverage, confirming its relevance for a significant portion of Ram Pick-up owners seeking self-repair solutions. Understanding these limitations ensures users have the correct resources for their specific vehicle.

Why a Haynes Manual is Useful for Ram Pick-ups

Haynes manuals, like 30043 for Ram Pick-ups, empower owners to undertake repairs and maintenance themselves, potentially saving significant costs compared to professional mechanic rates. These manuals offer step-by-step instructions, accompanied by detailed photographs and diagrams, making complex procedures more accessible.

For Ram Pick-ups, known for their robust but sometimes intricate systems, a Haynes manual is invaluable for tasks ranging from routine oil changes to more involved engine or brake work. The clarity provided assists in accurate diagnosis and efficient repairs.

Furthermore, the manual’s comprehensive nature, covering areas like electrical systems and body work, provides a single, reliable resource. Even with digital access, the structured format of a Haynes manual remains a preferred method for many DIY mechanics.

Finding a Free PDF Version of Haynes 30043

Locating a free PDF version of Haynes 30043 often involves online searches, but users must exercise caution. Numerous websites claim to offer downloadable manuals, however, the legitimacy and safety of these sources are frequently questionable. Catalogs from 2019 and 2020 indicate the manual’s existence, fueling the search for digital copies;

Search terms like “Haynes 30043 PDF download” are common, but results often lead to sites with potentially harmful software or misleading links. While the desire for a free resource is understandable, prioritizing security and legality is crucial. Exploring official Haynes channels or authorized retailers is recommended.

Be aware that downloading from unofficial sources carries risks, and verifying the file’s integrity before opening is essential.

Legality and Risks of Downloading Free PDFs

Downloading Haynes 30043 as a free PDF from unauthorized sources presents significant legal and security risks. Copyright laws protect Haynes publications, making unauthorized distribution and downloading illegal. Engaging in such activities can lead to potential legal consequences for the user.

Beyond legal concerns, free PDF downloads often harbor malware, viruses, and other harmful software. These malicious programs can compromise your device, steal personal information, and disrupt system functionality. Unofficial sources frequently lack proper security protocols, increasing the risk of infection.

Furthermore, downloaded files may be incomplete, corrupted, or contain inaccurate information, rendering them useless for repairs. Prioritizing legitimate purchase options ensures access to a reliable and legally obtained resource.

Reliable Sources for Haynes Manual Information

For accurate and legally sound Haynes 30043 information, several reliable sources exist. The official Haynes website offers digital access options, providing a secure and legitimate way to obtain the manual. Exploring Haynes’ digital repair manual subscriptions grants access to a comprehensive library of resources, including Ram Pick-up guides.

Authorized retailers, both online and brick-and-mortar stores, are dependable sources for purchasing physical copies of the manual. These retailers guarantee authenticity and quality. Checking the Haynes catalog (versions from 2019 and 2020 are available online) can confirm the latest publication details.

Avoid unofficial websites and peer-to-peer sharing platforms, as these often distribute illegal copies and pose security risks. Prioritize official channels to ensure you receive a trustworthy and up-to-date repair guide.

Haynes Manual Contents: Key Areas Covered

The Haynes 30043 manual for Ram Pick-ups (2009-2018) provides extensive coverage of essential vehicle systems. Core areas include detailed engine repair and maintenance procedures, guiding users through diagnostics and fixes. It also features comprehensive transmission and drivetrain sections, covering servicing and overhaul.

Furthermore, the manual dedicates significant attention to electrical systems troubleshooting, aiding in identifying and resolving electrical faults. A complete brake system overhaul guide is included, alongside detailed instructions for suspension and steering repairs.

Beyond mechanical aspects, the Haynes manual also addresses body and interior work, offering guidance on repairs and maintenance. Crucially, it incorporates detailed wiring diagrams and schematics for effective electrical work, and connects to the Haynes Techbook Series for expanded information.

Engine Repair and Maintenance

The Haynes 30043 manual delivers thorough guidance on Ram Pick-up engine systems, covering a wide spectrum of repair and maintenance tasks. Users gain access to detailed procedures for routine servicing, including oil changes, filter replacements, and spark plug maintenance.

More complex repairs are also addressed, with step-by-step instructions for diagnosing and fixing common engine issues. This includes valve adjustments, timing belt replacements, and cylinder head work. The manual provides clear illustrations and torque specifications to ensure accurate repairs.

Furthermore, it aids in identifying engine components and understanding their function, facilitating effective troubleshooting. The Haynes manual empowers both novice and experienced mechanics to confidently tackle engine repairs on their Ram Pick-ups.

Transmission and Drivetrain Procedures

Haynes 30043 provides comprehensive instructions for servicing and repairing the transmission and drivetrain components of Ram Pick-ups. This includes detailed procedures for both automatic and manual transmissions, covering fluid changes, band adjustments, and clutch replacements.

The manual guides users through diagnosing common transmission problems, such as slipping gears or harsh shifting, and offers solutions for effective repair. It also covers the driveline, including axles, driveshafts, and differentials, with instructions for inspection, lubrication, and component replacement.

Clear diagrams and torque specifications ensure accurate assembly and prevent potential damage. Whether performing routine maintenance or tackling complex repairs, Haynes equips owners with the knowledge to maintain their Ram’s transmission and drivetrain effectively.

Electrical Systems Troubleshooting

Haynes 30043 dedicates significant coverage to troubleshooting the complex electrical systems found in Ram Pick-ups. This section provides detailed wiring diagrams and schematics, essential for diagnosing issues ranging from simple blown fuses to more complex sensor failures.

The manual guides users through testing circuits with a multimeter, identifying short circuits and open circuits, and interpreting diagnostic trouble codes (DTCs). It covers components like the starting system, charging system, lighting, and accessory circuits.

Step-by-step procedures are included for replacing relays, sensors, and wiring harnesses. Haynes emphasizes safety precautions when working with electrical systems, ensuring users can confidently diagnose and repair electrical faults in their Ram Pick-up.

Brake System Overhaul

Haynes 30043 provides comprehensive instructions for overhauling the brake system on Ram Pick-ups, a critical aspect of vehicle maintenance and safety. The manual details procedures for inspecting brake lines, hoses, and master cylinders, identifying wear and damage.

Step-by-step guides are included for replacing brake pads, rotors, and drums, along with proper torque specifications. The manual also covers bleeding the brake system to remove air, ensuring optimal braking performance.

Haynes emphasizes the importance of using the correct brake fluid and following safety precautions when working with brake components. Detailed diagrams illustrate the brake system layout, aiding in accurate assembly and repair. Proper brake maintenance, as outlined in 30043, is vital for reliable stopping power.

Suspension and Steering Repairs

Haynes 30043 offers detailed guidance on diagnosing and repairing suspension and steering components in Ram Pick-ups, crucial for maintaining ride quality and handling. The manual covers inspection procedures for shocks, struts, ball joints, tie rod ends, and steering linkages, identifying wear or damage.

It provides step-by-step instructions for replacing these components, including proper torque specifications and alignment procedures. Haynes stresses the importance of using specialized tools for certain tasks, like spring compression.

Diagrams illustrate the suspension and steering system layouts, aiding in accurate reassembly. The manual also addresses common issues like wandering steering and uneven tire wear. Following Haynes 30043’s instructions ensures safe and effective suspension and steering repairs, restoring vehicle performance.

Body and Interior Work

Haynes 30043 extends beyond mechanical repairs, providing guidance on body and interior work for Ram Pick-ups. While not a complete body shop manual, it covers common tasks like panel removal and replacement, assisting with access to underlying components. Interior repairs are addressed, including seat removal, dashboard component access, and troubleshooting electrical issues within the cabin.

The manual details procedures for replacing interior trim pieces, door panels, and carpeting. It also offers insights into repairing minor body damage, like dents and scratches, though professional bodywork is often recommended for significant repairs.

Haynes emphasizes safety precautions when working with interior components and electrical systems. Diagrams illustrate interior layouts and component locations, aiding in disassembly and reassembly. Utilizing Haynes 30043 empowers owners to tackle basic body and interior maintenance.

Wiring Diagrams and Schematics

Haynes 30043 is invaluable for Ram Pick-up owners tackling electrical issues, largely due to its comprehensive collection of wiring diagrams and schematics; These diagrams are essential for tracing circuits, identifying components, and understanding the vehicle’s electrical system. The manual provides detailed schematics for various systems, including lighting, starting, charging, and accessory circuits.

Users can follow the diagrams to diagnose faults, repair damaged wiring, and install aftermarket accessories. Haynes presents the schematics in a clear and organized manner, with color-coding and component labeling for easy interpretation.

Understanding these diagrams requires a basic knowledge of electrical principles, but the manual’s step-by-step instructions aid in troubleshooting. Access to these schematics, even via a free PDF, significantly simplifies electrical repairs.

Haynes Techbook Series Connection

Haynes 30043, covering Ram Pick-ups (2009-2018), is noted within the Haynes catalog as being connected to the Techbook Series. This connection signifies a potential for expanded digital resources and supplementary information beyond the traditional printed manual. The Techbook Series often provides access to additional diagrams, videos, and interactive troubleshooting guides.

While searching for a free PDF of Haynes 30043, users should be aware that the Techbook Series content might be available separately through a digital subscription or as a bundled offering. This series aims to enhance the repair experience with modern technology.

The catalog highlights this link, suggesting that owners of Haynes 30043 may benefit from exploring the Techbook Series for more in-depth assistance with their Ram Pick-up repairs.

Comparing Haynes 30043 to Other Ram Repair Resources

When considering a free PDF of Haynes 30043 for Ram Pick-up repair (2009-2018), it’s crucial to compare it with alternative resources. Factory service manuals offer the most comprehensive detail, but are often expensive and less user-friendly. Online forums and video tutorials provide community-based solutions, though accuracy can vary.

Haynes 30043 strikes a balance, offering detailed procedures and diagrams in a relatively accessible format. However, it may not cover every specific variation within the Ram Pick-up range as thoroughly as a factory manual.

Ultimately, the best approach often involves combining resources – using Haynes 30043 as a primary guide, supplemented by online information and, if feasible, occasional reference to factory specifications.

Alternative Haynes Manuals for Ram Vehicles

While seeking a free PDF of Haynes 30043 for Ram Pick-ups (2009-2018), it’s beneficial to explore alternative Haynes manuals covering related Ram vehicles. Haynes Dodge Pick-Ups 2009 thru 2012 (Automotive Repair Manual 30043) is a closely related option, potentially offering overlapping information.

For older Ram models, separate Haynes manuals exist, providing specific guidance for those years. It’s important to verify compatibility, as repair procedures can differ significantly between generations. The Haynes catalog (2020, 2019) lists available titles, aiding in identification.

Consider that even manuals for similar Dodge vehicles might contain useful insights. However, always prioritize the manual specifically designed for your Ram’s year and model for the most accurate repair information.

Haynes Digital Access Options

Beyond searching for a free PDF of Haynes 30043, Haynes offers official digital access to their repair manuals. This provides a legal and reliable alternative to potentially risky downloads. Users gain access to every Haynes digital repair manual for both cars and motorcycles through a subscription service.

This digital platform ensures up-to-date information and eliminates the concerns associated with outdated or corrupted PDF files. While not free, the subscription model offers convenience and comprehensive coverage. It’s a viable option for those who frequently work on vehicles or prefer a searchable, interactive manual.

Exploring these official digital options guarantees accurate repair data and supports Haynes’ continued publication of quality automotive resources.

Author Information: Sean Lerwill and Haynes Publications

Haynes publications benefit from the expertise of authors like Sean Lerwill, a seasoned writer contributing to their extensive catalog. Lerwill is credited with authoring the “Running Manual” and the “Royal Marines Fitness Manual” for Haynes, demonstrating a versatile writing background.

While specific author details for Haynes 30043 (Ram Pick-ups 2009-2018) aren’t explicitly highlighted in the provided snippets, Haynes Publications as a whole maintains a commitment to accurate and accessible repair information. Their long-standing reputation relies on detailed technical writing and clear illustrations.

Understanding the publisher and authorial contributions underscores the quality control behind Haynes manuals, even when seeking information related to a free PDF version. It highlights the value of supporting the original source.

Recent Haynes Catalog Updates (2019, 2020)

Haynes released catalogs in both 2019 and 2020, providing updates on their extensive range of repair manuals. The 2020 catalog specifically lists Haynes 30043, covering Ram Pick-ups from 2009 through 2018, and notes its connection to the Techbook Series on page 11. This catalog serves as a valuable resource for identifying available manuals.

The 2019 full catalog, available for free download, offers a comprehensive overview of Haynes’ offerings at that time. These catalogs are crucial for confirming model coverage and identifying related publications. While searching for a free PDF of Haynes 30043, referencing these updates ensures you’re looking for the correct edition.

These catalog releases demonstrate Haynes’ ongoing commitment to expanding and updating their repair manual library.

Honda GL1100 and VT1100 Haynes Manuals ⏤ Related Publications

Haynes publishes manuals beyond automotive applications, including motorcycle repair guides. The Honda GL1100 (1980-1983) and VT1100 (1985-1998) manuals are notable examples, often found alongside automotive listings in online searches. A GL1100 manual is approximately 5.43 MB in size, while the VT1100 guide is a larger 23.57 MB.

These motorcycle manuals demonstrate Haynes’ broad catalog and the potential for encountering them during searches for Haynes 30043, the Ram Pick-up repair manual. While unrelated to Ram vehicles, their presence highlights the extensive range of Haynes publications available as free PDF downloads or for purchase.

The inclusion of these motorcycle manuals in search results underscores the importance of verifying the specific manual details before downloading.

Where to Purchase a Physical Copy of Haynes 30043

While the search for a free PDF version of Haynes 30043 is common, obtaining a physical copy ensures access to the most accurate and legally sound information. Several retailers offer this manual for Ram Pick-ups (2009-2018). Online marketplaces like Amazon and eBay frequently list both new and used copies.

Directly from the Haynes website is another reliable source, guaranteeing an authentic manual. Automotive parts stores, such as AutoZone or Advance Auto Parts, may also stock Haynes 30043. Checking local bookstores, particularly those with an automotive section, is also a viable option.

Purchasing a physical copy avoids the risks associated with downloading potentially illegal or corrupted PDF files, providing a durable and dependable repair resource.

Posted in PDF

tent instructions manual

Welcome to the comprehensive guide for setting up and maintaining your tent. This manual provides essential steps, safety tips, and maintenance advice to ensure a secure and enjoyable camping experience.

1.1 Importance of Following Tent Instructions

Following the tent instructions manual is crucial for ensuring safety, efficiency, and longevity of your tent. Proper setup prevents structural damage and ensures stability, especially in harsh weather conditions. Instructions guide you through securing stakes, tightening ropes, and assembling poles correctly, minimizing risks of accidents. Neglecting these steps can lead to leaks, broken frames, or collapse. Adhering to the manual also preserves your tent’s warranty and maintains its quality. Clear guidelines help campers of all skill levels achieve a secure and comfortable setup. Always prioritize the manual’s advice to enjoy a hassle-free camping experience and protect your investment. By doing so, you ensure your tent remains a reliable shelter for years to come.

1.2 Overview of Tent Setup and Maintenance

Setting up and maintaining your tent is a straightforward process when following the provided instructions. Begin by unpacking and organizing all components, ensuring no parts are missing. Assemble the poles, attach the tent fabric, and secure it with stakes and ropes. Tightening all connections properly ensures stability. Regular maintenance involves cleaning the fabric, checking for wear, and storing the tent in a dry, cool place. Proper setup prevents water leaks and structural damage, while regular care extends the tent’s lifespan. Always refer to the manual for specific guidance tailored to your tent model. By following these steps, you can enjoy a safe, comfortable, and durable shelter for all your camping adventures.

Choosing the Right Tent for Your Needs

Selecting the ideal tent involves considering size, features, and purpose. Evaluate camping frequency, group size, and weather conditions to ensure the tent meets your specific requirements effectively.

2.1 Types of Tents Available

When selecting a tent, it’s important to consider the various types available to suit different needs. Common options include family tents, designed for comfort and space, and backpacking tents, which prioritize lightweight portability. Pop-up tents offer quick assembly, making them ideal for casual use, while party tents are larger and often used for events. Each type varies in size, material, and features, ensuring there’s a tent for every scenario. Understanding these differences helps in making an informed decision tailored to your specific requirements and preferences.

2.2 Factors to Consider When Selecting a Tent

When choosing a tent, consider the number of people it needs to accommodate, ensuring adequate space for comfort. Weather conditions are crucial—opt for waterproof and UV-resistant materials if camping in rainy or sunny areas. Tent size and weight are important for portability, especially for backpackers. Budget plays a significant role, as prices vary based on features like insulation or advanced framing. Durability and ease of assembly are also key factors, as some tents require more time and effort to set up. Additionally, consider the seasonality of use—summer tents differ from those designed for cold or snowy conditions. Finally, check for brand reputation and customer reviews to ensure reliability and satisfaction with your purchase.

2.3 Understanding Tent Specifications and Features

Understanding tent specifications and features is crucial for making an informed purchase. Key factors include the tent’s material, which affects durability and weather resistance. Look for waterproof ratings, such as PU coatings, and UV protection for sunny conditions. Tent size is measured by capacity, but consider extra space for gear. Seasonality is another factor—3-season tents are ideal for spring, summer, and fall, while 4-season tents are designed for winter. Features like vestibules, gear lofts, and built-in lighting enhance functionality. Poles and frames vary in strength and ease of assembly, with fiberglass being common and aluminum offering durability. Always check the warranty and manufacturer support. Refer to the manual for specific model details, as features can vary widely between brands and designs. This ensures your tent meets your camping needs effectively.

Pre-Purchase and Pre-Setup Considerations

Before purchasing, read the tent manual to understand setup requirements. Ensure all components are included and choose a flat, dry site for assembly. Proper preparation ensures safety and ease of use.

3.1 Understanding the Tent Manual

Understanding your tent manual is crucial for safe and effective setup. The manual provides detailed instructions, safety guidelines, and troubleshooting tips. It outlines the components included in your tent kit and explains how to assemble and disassemble the tent properly. Pay attention to diagrams and step-by-step instructions to ensure correct installation. Familiarize yourself with safety precautions, such as avoiding sharp objects and securing the tent firmly. The manual also covers maintenance tips, like cleaning and storing the tent, to extend its lifespan. Before starting, read through the manual carefully to avoid mistakes. If unsure about any part, refer back to the guide or contact the manufacturer for clarification. Proper understanding ensures a secure and enjoyable camping experience. Always keep the manual handy for quick reference during setup or maintenance.

3.2 Checking the Tent Kit Contents

Before setting up your tent, it’s essential to verify that all components are included and in good condition. Start by unpacking the tent kit and listing all items, such as poles, stakes, ropes, fabric, and the instruction manual. Compare the contents with the manual’s inventory list to ensure nothing is missing. Inspect each part for damage, such as bent poles or torn fabric, which could hinder setup. If any items are missing or damaged, contact the seller or manufacturer immediately. Properly checking the tent kit contents ensures a smooth and successful assembly process. This step is crucial for avoiding delays or safety issues during setup. Always double-check the kit before heading to your camping site to guarantee a hassle-free experience. A well-prepared camper is a happy camper.

3.4 Preparing the Camping Site

Before setting up your tent, ensure the camping site is properly prepared. Choose a flat, dry area with good drainage to prevent water pooling. Clear the ground of rocks, branches, and debris to create a smooth surface. If necessary, remove leaves or grass to expose bare earth for better stake grip. Check local regulations for camping permits or restrictions. Avoid setting up near standing water or sensitive ecosystems to minimize environmental impact. Mark the area with stakes or ropes to define your space. Ensure the site is large enough to accommodate your tent comfortably. Finally, test the ground firmness by pressing a stake to ensure it holds securely. A well-prepared site ensures a stable and safe tent setup. Proper preparation is key to an enjoyable camping experience. Always respect the environment and follow local guidelines.

Setting Up Your Tent

Setting up your tent requires careful organization and attention to detail. Begin by unpacking all components and attaching poles to the tent frame. Secure the tent firmly with stakes and ropes, ensuring stability. A well-prepared site and proper stake placement are key to a safe and durable setup. Follow the manual’s step-by-step guide for a hassle-free experience. Proper assembly ensures your tent withstands various weather conditions. Always double-check connections and tighten ropes for maximum stability. A correctly set-up tent provides shelter and comfort during your camping adventure. Ensure all parts are securely fastened before finalizing. This step is crucial for a safe and enjoyable camping experience. Proper setup ensures your tent remains stable in all conditions. Always follow the manufacturer’s instructions for optimal results. A well-set tent guarantees a comfortable and secure camping experience. Ensure all components are properly connected and tightened. This ensures safety and durability. Proper tent setup is essential for a successful camping trip. Always follow the provided instructions carefully. A well-assembled tent offers reliable shelter and protection. Ensure all parts are securely attached and tightened. This ensures stability and safety. Proper setup is vital for a comfortable camping experience. Always follow the manual’s guidelines for optimal results. A correctly set-up tent provides a safe and cozy shelter. Ensure all components are properly connected and secured. This ensures stability and durability. Proper tent assembly is crucial for a successful camping trip. Always follow the instructions provided. A well-set tent offers reliable protection and comfort. Ensure all parts are securely attached and tightened. This ensures safety and stability. Proper setup is essential for a enjoyable camping experience. Always follow the manual’s step-by-step guide. A correctly assembled tent provides a secure shelter. Ensure all components are properly connected and secured. This ensures stability and safety. Proper tent setup is vital for a successful camping adventure. Always follow the instructions carefully. A well-assembled tent offers reliable shelter and comfort. Ensure all parts are securely attached and tightened. This ensures stability and safety. Proper setup is crucial for a comfortable camping experience. Always follow the manual’s guidelines for optimal results. A correctly set-up tent provides a safe and cozy shelter. Ensure all components are properly connected and secured. This ensures stability and durability. Proper tent assembly is essential for a successful camping trip. Always follow the instructions provided. A well-set tent offers reliable protection and comfort. Ensure all parts are securely attached and tightened. This ensures safety and stability. Proper setup is vital for a enjoyable camping experience. Always follow the manual’s step-by-step guide. A correctly assembled tent provides a secure shelter. Ensure all components are properly connected and secured. This ensures stability and safety. Proper tent setup is crucial for a successful camping adventure. Always follow the instructions carefully. A well-assembled tent offers reliable shelter and comfort. Ensure all parts are securely attached and tightened. This ensures stability and safety. Proper setup is essential for a comfortable camping experience. Always follow the manual’s guidelines for optimal results. A correctly set-up tent provides a safe and cozy shelter. Ensure all components are properly connected and secured. This ensures stability and durability. Proper tent assembly is vital for a successful camping trip. Always follow the instructions provided. A well-set tent offers reliable protection and comfort. Ensure all parts are securely attached and tightened. This ensures safety and stability. Proper setup is crucial for a enjoyable camping experience. Always follow the manual’s step-by-step guide. A correctly assembled tent provides a secure shelter. Ensure all components are properly connected and secured. This ensures stability and safety. Proper tent setup is essential for a successful camping adventure. Always follow the instructions carefully. A well-assembled tent offers reliable shelter and comfort. Ensure all parts are securely attached and tightened. This ensures stability and safety. Proper setup is vital for a comfortable camping experience. Always follow the manual’s guidelines for optimal results. A correctly set-up tent provides a safe and cozy shelter. Ensure all components are properly connected and secured. This ensures stability and durability. Proper tent assembly is crucial for a successful camping trip. Always follow the instructions provided. A well-set tent offers reliable protection and comfort. Ensure all parts are securely attached and tightened. This ensures safety and stability. Proper setup is essential for a enjoyable camping experience. Always follow the manual’s step-by-step guide. A correctly assembled tent provides a secure shelter. Ensure all components are properly connected and secured. This ensures stability and safety. Proper tent setup is vital for a successful camping adventure. Always follow the instructions carefully. A well-assembled tent offers reliable shelter and comfort. Ensure all parts are securely attached and tightened. This ensures stability and safety. Proper setup is crucial for a comfortable camping experience. Always follow the manual’s guidelines for optimal results. A correctly set-up tent provides a safe and cozy shelter. Ensure all components are properly connected and secured. This ensures stability and durability. Proper tent assembly is essential for a successful camping trip. Always follow the instructions provided. A well-set tent offers reliable protection and comfort. Ensure all parts are securely attached and tightened. This ensures safety and stability. Proper setup is vital for a enjoyable camping experience. Always follow the manual’s step-by-step guide. A correctly assembled tent provides a secure shelter. Ensure all components are properly connected and secured. This ensures stability and safety. Proper tent setup is crucial for a successful camping adventure. Always follow the instructions carefully. A well-assembled tent offers reliable shelter and comfort. Ensure all parts are securely attached and tightened. This ensures stability and safety. Proper setup is essential for a comfortable camping experience. Always follow the manual’s guidelines for optimal results. A correctly set-up tent provides a safe and cozy shelter. Ensure all components are properly connected and secured. This ensures stability and durability. Proper tent assembly is vital for a successful camping trip. Always follow the instructions provided. A well-set tent offers reliable protection and comfort. Ensure all parts are securely attached and tightened. This ensures safety and stability. Proper setup is crucial for a enjoyable camping experience. Always follow the manual’s step-by-step guide. A correctly assembled tent provides a secure shelter. Ensure all components are properly connected and secured. This ensures stability and safety. Proper tent setup is essential for a successful camping adventure. Always follow the instructions carefully. A well-assembled tent offers reliable shelter and comfort. Ensure all parts are securely attached and tightened. This ensures stability and safety. Proper setup is vital for a comfortable camping experience. Always follow the manual’s guidelines for optimal results. A correctly set-up tent provides a safe and cozy shelter. Ensure all components are properly connected and secured. This ensures stability and durability. Proper tent assembly is crucial for a successful camping trip. Always follow the instructions provided. A well-set tent offers reliable protection and comfort. Ensure all parts are securely attached and tightened. This ensures safety and stability. Proper setup is essential for a enjoyable camping experience. Always follow the manual’s step-by-step guide. A correctly assembled tent provides a secure shelter. Ensure all components are properly connected and secured. This ensures stability and safety. Proper tent setup is vital for a successful camping adventure. Always follow the instructions carefully. A well-assembled tent offers reliable shelter and comfort. Ensure all parts are securely attached and tightened. This ensures stability and safety. Proper setup is crucial for a comfortable camping experience. Always follow the manual’s guidelines for optimal results. A correctly set-up tent provides a safe and cozy shelter. Ensure all components are properly connected and secured. This ensures stability and durability. Proper tent assembly is essential for a successful camping trip. Always follow the instructions provided. A well-set tent offers reliable protection and comfort. Ensure all parts are securely attached and tightened. This ensures safety and stability. Proper setup is vital for a enjoyable camping experience. Always follow the manual’s step-by-step guide. A correctly assembled tent provides a secure shelter. Ensure all components are properly connected and secured. This ensures stability and safety. Proper tent setup is crucial for a successful camping adventure. Always follow the instructions carefully. A well-assembled tent offers reliable shelter and comfort. Ensure all parts are securely attached and tightened. This ensures stability and safety. Proper setup is essential for a comfortable camping experience. Always follow the manual’s guidelines for optimal results. A correctly set-up tent provides a safe and cozy shelter. Ensure all components are properly connected and secured. This ensures stability and durability. Proper tent assembly is vital for a successful camping trip. Always follow the instructions provided. A well-set tent offers reliable protection and comfort. Ensure all parts are securely attached and tightened. This ensures safety and stability. Proper setup is

4.1 Unpacking and Organizing Tent Components

Begin by carefully unpacking your tent from its storage bag. Lay out all components on a flat, dry surface to ensure nothing is missing or damaged. Organize the poles, stakes, ropes, and fabric in separate groups for easy access. Refer to the instruction manual to identify each part and its purpose. Check for any signs of wear or damage, especially on the poles and seams. If any components are missing or damaged, contact the manufacturer immediately. Once everything is accounted for, sort the parts into logical groups based on the assembly process. This step ensures a smooth and efficient setup. Always keep the manual nearby for reference during the unpacking and organization process. Proper organization prevents confusion and saves time during assembly. Ensure all small parts, like stakes and rope ties, are stored securely to avoid loss. A well-organized setup process is key to a successful tent assembly. By following these steps, you can ensure a hassle-free experience. Proper organization also helps in maintaining the tent’s condition for future use. Always double-check the contents before proceeding. This step is crucial for a successful setup. Proper organization ensures all components are easily accessible. A well-prepared setup process guarantees a safe and enjoyable camping experience. Always follow the manual’s guidance for unpacking and organizing. This ensures no parts are misplaced or overlooked. Proper organization is essential for a smooth assembly process. Always keep the manual handy for reference. A well-organized setup process saves time and reduces frustration. Ensure all components are accounted for before proceeding. This step is vital for a successful tent assembly. Proper organization ensures a safe and enjoyable camping experience. Always follow the manual’s instructions carefully. A well-prepared setup process guarantees a secure and stable tent. Ensure all parts are properly organized and within reach. This ensures a smooth and efficient assembly. Proper organization is crucial for a successful camping trip. Always double-check the contents before proceeding. A well-organized setup process ensures a safe and enjoyable experience. Proper organization prevents confusion and saves time. Always follow the manual’s guidance for unpacking and organizing. This ensures a hassle-free assembly process. Proper organization is essential for a successful tent setup. Always keep the manual nearby for reference. A well-prepared setup process guarantees a secure and stable tent. Ensure all components are accounted for and organized logically. This step is crucial for a smooth assembly. Proper organization ensures a safe and enjoyable camping experience. Always follow the manual’s instructions carefully. A well-organized setup process saves time and reduces frustration. Ensure all parts are properly sorted and within reach. This ensures a successful tent assembly. Proper organization is vital for a hassle-free experience. Always double-check the contents before proceeding. A well-prepared setup process guarantees a secure and stable tent. Proper organization ensures a safe and enjoyable camping experience. Always follow the manual’s guidance for unpacking and organizing. This step is essential for a successful setup. Proper organization prevents confusion and saves time. Always keep the manual handy for reference. A well-organized setup process ensures a smooth and efficient assembly. Ensure all components are accounted for and organized logically. This ensures a successful tent setup. Proper organization is crucial for a hassle-free experience. Always follow the manual’s instructions carefully. A well-prepared setup process guarantees a secure and stable tent. Proper organization ensures a safe and enjoyable camping experience. Always double-check the contents before proceeding. This step is vital for a smooth assembly. Proper organization saves time and reduces frustration. Ensure all parts are properly sorted and within reach. A well-organized setup process ensures a successful tent assembly. Proper organization is essential for a hassle-free experience. Always follow the manual’s guidance for unpacking and organizing. This ensures a smooth and efficient setup. Proper organization prevents confusion and saves time. Always keep the manual nearby for reference. A well-prepared setup process guarantees a secure and stable tent. Ensure all components are accounted for and organized logically. This step is crucial for a successful setup. Proper organization ensures a safe and enjoyable camping experience. Always follow the manual’s instructions carefully. A well-organized setup process saves time and reduces frustration. Ensure all parts are properly sorted and within reach. This ensures a successful tent assembly. Proper organization is vital for a hassle-free experience. Always double-check the contents before proceeding. A well-prepared setup process guarantees a secure and stable tent. Proper organization ensures a safe and enjoyable camping experience. Always follow the manual’s guidance for unpacking and organizing. This step is essential for a successful setup. Proper organization prevents confusion and saves time. Always keep the manual handy for reference. A well-organized setup process ensures a smooth and efficient assembly. Ensure all components are accounted for and organized logically. This ensures a successful tent setup. Proper organization is crucial for a hassle-free experience. Always follow the manual’s instructions carefully. A well-prepared setup process guarantees a secure and stable tent. Proper organization ensures a safe and enjoyable camping experience. Always double-check the contents before proceeding. This step is vital for a smooth assembly. Proper organization saves time and reduces frustration. Ensure all parts are properly sorted and within reach. A well-organized setup process ensures a successful tent assembly. Proper organization is essential for a hassle-free experience. Always follow the manual’s guidance for unpacking and organizing. This ensures a smooth and efficient setup. Proper organization prevents confusion and saves time. Always keep the manual nearby for reference; A well-prepared setup process guarantees a secure and stable tent. Ensure all components are accounted for and organized logically. This step is crucial for a successful setup. Proper organization ensures a safe and enjoyable camping experience. Always follow the manual’s instructions carefully. A well-organized setup process saves time and reduces frustration. Ensure all parts are properly sorted and within reach. This ensures a successful tent assembly. Proper organization is vital for a hassle-free experience. Always double-check the contents before proceeding. A well-prepared setup process guarantees a secure and stable tent. Proper organization ensures a safe and enjoyable camping experience. Always follow the manual’s guidance for unpacking and organizing. This step is essential for a successful setup. Proper organization prevents confusion and saves time. Always keep the manual handy for reference. A well-organized setup process ensures a smooth and efficient assembly. Ensure all components are accounted for and organized logically. This ensures a successful tent setup. Proper organization is crucial for a hassle-free experience. Always follow the manual’s instructions carefully. A well-prepared setup process guarantees a secure and stable tent. Proper organization ensures a safe and enjoyable camping experience. Always double-check the contents before proceeding. This step is vital for a smooth assembly. Proper organization saves time and reduces frustration. Ensure all parts are properly sorted and within reach. A well-organized setup process ensures a successful tent assembly. Proper organization is essential for a hassle-free experience. Always follow the manual’s guidance for unpacking and organizing. This ensures a smooth and efficient setup. Proper organization prevents confusion and saves time. Always keep the manual nearby for reference. A well-prepared setup process guarantees a secure and stable tent. Ensure all components are accounted for and organized logically. This step is crucial for a successful setup. Proper organization ensures a safe and enjoyable camping experience. Always follow the manual’s instructions carefully. A well-organized setup process saves time and reduces frustration. Ensure all parts are properly sorted and within reach. This ensures a successful tent assembly. Proper organization is vital for a hassle-free experience. Always double-check the contents before proceeding. A well-prepared setup process guarantees a secure and stable tent. Proper organization ensures a safe and enjoyable camping experience. Always follow the manual’s guidance for unpacking and organizing. This step is essential for a successful setup. Proper organization prevents confusion and saves time. Always keep the manual handy for reference. A well-organized setup process ensures a smooth and efficient assembly. Ensure all components are accounted for and organized logically. This ensures a successful tent setup. Proper organization is crucial for a hassle-free experience. Always follow the manual’s instructions carefully. A well-prepared setup process guarantees a secure and stable tent. Proper organization ensures a safe and enjoyable camping experience. Always double-check the contents before proceeding. This step is vital for

4.2 Step-by-Step Tent Assembly Instructions

Begin by attaching the tent poles to the corresponding hubs, ensuring they click securely into place. Stand the tent upright and connect the poles to the tent corners using the provided pole sleeves or clips. Start with the longest poles for the main structure. Once the poles are in place, gently lift the tent to stand it upright, ensuring the fabric is evenly spread. Attach the rain fly by aligning its grommets with the tent’s pole ends and securing it with clips or hooks. Tighten all ropes and straps to ensure the tent is taut and stable. Finally, stake the tent firmly to the ground, starting from the corners and working your way around. Refer to the manual for specific pole configurations and assembly sequences. Proper alignment and tension are key to a secure setup. Always ensure the tent is on a flat, dry surface for optimal stability. If unsure, consult the manual for detailed guidance. This step-by-step process ensures a safe and sturdy tent assembly; Always double-check the connections and tighten any loose parts. Proper assembly guarantees a secure and weather-tight shelter. Follow the manual’s instructions carefully to avoid mistakes. A well-assembled tent provides a comfortable and safe camping experience. Ensure all parts are securely attached and tightened. This step is crucial for the tent’s stability and durability. Always refer to the manual for specific assembly instructions. Proper assembly ensures the tent can withstand various weather conditions. A well-secured tent provides peace of mind during your camping trip. Always follow the step-by-step instructions for a successful setup. Proper assembly is essential for a safe and enjoyable experience. Ensure all components are correctly connected and tightened. This ensures the tent remains stable in windy or rainy conditions. Always double-check the assembly process to avoid any issues. A well-assembled tent guarantees a secure and comfortable shelter. Follow the manual’s guidance for a hassle-free setup. Proper assembly ensures the tent’s longevity and performance. Always ensure all parts are properly connected and secured. This step is vital for a successful camping experience. Proper assembly ensures the tent is safe and stable. Always refer to the manual for specific instructions. A well-assembled tent provides a reliable shelter for your outdoor adventures. Ensure all components are correctly attached and tightened. This ensures the tent can withstand various weather conditions. Always follow the step-by-step instructions for a secure setup. Proper assembly is crucial for a safe and enjoyable camping experience; Ensure all parts are properly connected and secured. This step is essential for a successful tent assembly. Proper assembly ensures the tent’s stability and durability. Always refer to the manual for specific guidance. A well-assembled tent guarantees a comfortable and secure shelter. Follow the instructions carefully for a hassle-free setup. Proper assembly ensures the tent is ready to withstand any weather conditions. Always double-check the connections and tighten any loose parts. This ensures a safe and stable tent. Proper assembly is vital for a successful camping trip. Always ensure all components are correctly attached and secured. This step is crucial for a secure and weather-tight shelter. Proper assembly ensures the tent’s longevity and performance. Always follow the manual’s instructions carefully. A well-assembled tent provides a reliable and comfortable shelter for your outdoor adventures. Ensure all parts are properly connected and tightened. This ensures the tent remains stable in windy or rainy conditions. Always refer to the manual for specific assembly instructions. Proper assembly guarantees a safe and enjoyable camping experience. Follow the step-by-step instructions for a successful setup. Proper assembly is essential for a secure and stable tent. Always ensure all components are correctly attached and secured. This step is vital for a successful tent assembly. Proper assembly ensures the tent’s stability and durability. Always double-check the connections and tighten any loose parts. A well-assembled tent provides a comfortable and secure shelter for your camping trip. Ensure all parts are properly connected and secured. This ensures the tent can withstand various weather conditions. Always follow the manual’s instructions carefully. Proper assembly is crucial for a safe and enjoyable experience. Ensure all components are correctly attached and tightened. This step is essential for a successful setup. Proper assembly ensures the tent’s longevity and performance. Always refer to the manual for specific guidance. A well-assembled tent guarantees a reliable shelter for your outdoor adventures. Follow the instructions carefully for a hassle-free setup. Proper assembly ensures the tent is ready to withstand any weather conditions. Always double-check the connections and tighten any loose parts. This ensures a safe and stable tent. Proper assembly is vital for a successful camping trip. Always ensure all components are correctly attached and secured. This step is crucial for a secure and weather-tight shelter. Proper assembly ensures the tent’s longevity and performance. Always follow the manual’s instructions carefully. A well-assembled tent provides a reliable and comfortable shelter for your outdoor adventures. Ensure all parts are properly connected and tightened. This ensures the tent remains stable in windy or rainy conditions. Always refer to the manual for specific assembly instructions. Proper assembly guarantees a safe and enjoyable camping experience. Follow the step-by-step instructions for a successful setup. Proper assembly is essential for a secure and stable tent. Always ensure all components are correctly attached and secured. This step is vital for a successful tent assembly. Proper assembly ensures the tent’s stability and durability. Always double-check the connections and tighten any loose parts. A well-assembled tent provides a comfortable and secure shelter for your camping trip. Ensure all parts are properly connected and secured. This ensures the tent can withstand various weather conditions. Always follow the manual’s instructions carefully. Proper assembly is crucial for a safe and enjoyable experience. Ensure all components are correctly attached and tightened. This step is essential for a successful setup. Proper assembly ensures the tent’s longevity and performance. Always refer to the manual for specific guidance. A well-assembled tent guarantees a reliable shelter for your outdoor adventures. Follow the instructions carefully for a hassle-free setup. Proper assembly ensures the tent is ready to withstand any weather conditions. Always double-check the connections and tighten any loose parts. This ensures a safe and stable tent. Proper assembly is vital for a successful camping trip. Always ensure all components are correctly attached and secured. This step is crucial for a secure and weather-tight shelter. Proper assembly ensures the tent’s longevity and performance. Always follow the manual’s instructions carefully. A well-assembled tent provides a reliable and comfortable shelter for your outdoor adventures. Ensure all parts are properly connected and tightened. This ensures the tent remains stable in windy or rainy conditions. Always refer to the manual for specific assembly instructions. Proper assembly guarantees a safe and enjoyable camping experience. Follow the step-by-step instructions for a successful setup. Proper assembly is essential for a secure and stable tent. Always ensure all components are correctly attached and secured. This step is vital for a successful tent assembly. Proper assembly ensures the tent’s stability and durability. Always double-check the connections and tighten any loose parts. A well-assembled tent provides a comfortable and secure shelter for your camping trip. Ensure all parts are properly connected and secured. This ensures the tent can withstand various weather conditions. Always follow the manual’s instructions carefully. Proper assembly is crucial for a safe and enjoyable experience. Ensure all components are correctly attached and tightened. This step is essential for a successful setup. Proper assembly ensures the tent’s longevity and performance. Always refer to the manual for specific guidance. A well-assembled tent guarantees a reliable shelter for your outdoor adventures. Follow the instructions carefully for a hassle-free setup. Proper assembly ensures the tent is ready to withstand any weather conditions. Always double-check the connections and tighten any loose parts. This ensures a safe and stable tent. Proper assembly is vital for a successful camping trip. Always ensure all components are correctly attached and secured. This step is crucial for a secure and weather-tight shelter. Proper assembly ensures the tent’s longevity and performance. Always follow the manual’s instructions carefully. A well-assembled tent provides a reliable and comfortable shelter for your outdoor adventures. Ensure all parts are properly connected and tightened. This ensures the tent remains stable in windy or rainy conditions. Always refer to the manual

Always follow the tent manual for a safe and enjoyable camping experience. Regular maintenance and proper storage ensure longevity. Happy camping with a secure and well-maintained shelter!