The Floor is Lava Game: A Comprehensive Guide
Discover comprehensive instructions and rules for both the classic childhood game and the “The Floor is Lava” board game adaptation, readily available as PDF resources online!
Explore “The Secret Book of Tiki” PDF for detailed tabletop roleplaying game rules, enhancing imaginative play and strategic thinking for all ages.
Find complete instructions included with the Magma Games board game, detailing stone placement, challenge cards, and spinner mechanics for a thrilling lava-avoiding experience.
What is “The Floor is Lava”?
“The Floor is Lava” is a universally recognized children’s game rooted in imaginative play, where players pretend the floor has transformed into scorching lava. The core premise revolves around avoiding contact with the “lava” – the floor – by swiftly maneuvering onto furniture, rugs, or any elevated, designated safe zone.
The game’s simplicity is its brilliance; it requires no equipment initially, fostering creativity and quick thinking. A player shouts the iconic phrase, “The Floor is Lava!”, instantly initiating the challenge.
However, a commercially available board game adaptation, created by Magma Games, offers a structured experience. PDF instructions for this version detail specific rules, components like stones and challenge cards, and a spinner to dictate gameplay. These PDF resources, alongside guides like “The Secret Book of Tiki”, expand the game into a tabletop roleplaying adventure, offering a more complex and strategic experience beyond the initial spontaneous play.
The Core Concept: Avoiding the Lava
The fundamental principle of “The Floor is Lava” centers on agile movement and strategic thinking to evade the imaginary, yet perilous, lava covering the floor. Players must rapidly ascend onto any available safe surface – chairs, tables, cushions – the moment the trigger phrase is declared.
Success hinges on maintaining balance and problem-solving skills, quickly assessing the environment for viable pathways and stable landing spots. The board game adaptation, detailed in its PDF instructions, introduces additional layers of complexity.
Players navigate a landscape of “stones,” utilizing challenge cards (outlined in the PDF) that demand physical feats or mental agility. Falling into the lava – touching the floor – results in elimination. Resources like “The Secret Book of Tiki” PDF further refine this concept for tabletop roleplaying, adding narrative elements and character-specific challenges to the core avoidance mechanic.

Origins of the Game: From Playground to Board Game
“The Floor is Lava” began as a spontaneous, imaginative game played by children, requiring no formal rules or equipment – simply a declaration and a frantic scramble for safety. This organic origin fueled its widespread popularity, passed down through generations via word of mouth.
The game’s enduring appeal led to its commercialization with the release of “The Floor is Lava” by Magma Games. The board game, detailed in its accompanying PDF instructions, translates the freeform playground experience into a structured, competitive format.
Further expansions of the game’s concept appear in resources like “The Secret Book of Tiki,” available as a PDF, which adapts it into a tabletop roleplaying experience. These PDF guides demonstrate how the core concept of avoiding the lava has evolved, retaining its playful spirit while adding layers of strategic depth and narrative engagement.
Gameplay Basics: How a Round Works
A round of “The Floor is Lava” initiates with the pivotal phrase: “The Floor is Lava!” Immediately, players must elevate themselves from the floor, utilizing furniture, rugs, or any available safe zone. The core objective is to remain aloft for a designated duration, or until the game leader declares the lava has cooled.
The board game, as outlined in its PDF instructions, introduces a structured turn-based system. Players navigate a landscape of stones, responding to challenges dictated by cards and the spinner. Careful balance and problem-solving are crucial to avoid “falling into the lava.”
PDF resources, including “The Secret Book of Tiki,” detail variations for roleplaying scenarios, where players might encounter narrative obstacles alongside the physical challenge of lava avoidance. Regardless of the format, the fundamental gameplay loop revolves around quick thinking and agile movement.
The Trigger Phrase: “The Floor is Lava!”
The declaration “The Floor is Lava!” serves as the instantaneous catalyst for action, transforming any ordinary surface into a perilous, fiery abyss. This phrase, simple yet effective, is the universally recognized starting signal for the game, instantly demanding a swift and strategic response from all players.
PDF instructions for both the classic game and the board game adaptation consistently emphasize the immediacy of this trigger. The moment the phrase is uttered, players must abandon floor contact, initiating a scramble for safety.
Even “The Secret Book of Tiki,” detailing the tabletop roleplaying version, acknowledges the phrase’s importance as a narrative cue, signaling a shift in the game’s dynamic. The PDF guides highlight that the phrase isn’t merely a rule, but an invitation to imaginative play and quick reflexes.
Safe Zones: Identifying Permitted Surfaces
Determining “safe zones” is crucial in “The Floor is Lava,” and PDF instructions for the classic game are delightfully open-ended. Essentially, anything not the floor is fair game! Players can utilize furniture – chairs, sofas, tables – rugs, and even other players (with consent!) as temporary havens from the imaginary lava.
The Magma Games board game PDF introduces “stones” as designated safe zones, strategically placed to create a challenging course. These stones, varying in type (regular, question mark, danger), dictate movement and potential challenges.
“The Secret Book of Tiki” PDF expands on this, allowing players to creatively define safe zones within the roleplaying narrative. The core principle, however, remains consistent: survival depends on identifying and reaching permissible surfaces before succumbing to the fiery fate below. Improvisation and quick thinking are key!
Variations in Gameplay Rules
“The Floor is Lava” boasts incredible flexibility, with numerous rule variations detailed across various PDF resources. The core game, as outlined in many online guides, centers on avoiding the floor after the trigger phrase, but complexity can be added.
Magma Games’ board game PDF introduces challenge cards, dictating specific movement restrictions or tasks players must complete while airborne, adding a strategic layer. “The Secret Book of Tiki” PDF, geared towards tabletop roleplaying, encourages narrative-driven variations, incorporating character abilities and environmental storytelling.
Common house rules, often shared in online PDF compilations, include time limits for remaining on a single safe zone, restrictions on how many players can occupy the same space, or even introducing “lava currents” that periodically change safe zones. These variations enhance replayability and cater to different age groups.
Time Limits: Adding Pressure to the Game
Introducing time limits dramatically increases the intensity of “The Floor is Lava,” a variation frequently detailed in downloadable PDF rule sets found online. These rules, often user-created and shared, stipulate a maximum duration players can remain on any single safe surface before needing to relocate.
The Magma Games board game PDF doesn’t explicitly enforce a global time limit, but challenge cards can indirectly create time pressure, requiring swift actions. However, many online PDF guides suggest implementing a timer – ranging from 10 to 30 seconds – to force quicker decision-making and more dynamic movement.
“The Secret Book of Tiki” PDF, for the tabletop RPG adaptation, allows for more flexible time constraints, tied to narrative events or character actions. This adds a layer of strategic urgency, compelling players to balance risk and reward while avoiding the fiery “lava” below.
Elimination Rules: What Happens When You “Fall In”
When a player’s body touches the designated “lava” (the floor), elimination rules come into play, details of which are often clarified in freely available PDF instruction guides. The most common rule dictates immediate removal from the current round, transforming the eliminated player into an observer.
The official Magma Games board game PDF instructions state that falling into the lava means a player is “burned” and out of the round. However, some house rules, detailed in fan-created PDFs, allow for a single “rescue” by another player, adding a cooperative element.
“The Secret Book of Tiki” PDF, governing the tabletop RPG version, presents more nuanced consequences. Falling into the lava might result in character injury, temporary setbacks, or even a narrative shift, rather than outright elimination, depending on the game master’s discretion.
The Board Game Adaptation: “The Floor is Lava” by Magma Games
Magma Games successfully translated the classic children’s game into a thrilling tabletop experience, “The Floor is Lava.” Detailed instructions, readily available as a PDF, guide players through a dynamic challenge of balance and problem-solving. The game centers around strategically navigating a landscape of “stones” – regular, question mark, and danger stones – without touching the “lava.”
The official PDF instruction manual outlines setup, gameplay, and the use of 50 Challenge Cards featuring 100 unique obstacles. Players spin a spinner to determine actions, adding an element of unpredictability. The game accommodates 3 or more players, aged 5 and up, promising “lava-filled” fun!
The PDF also clarifies rules regarding safe zones, elimination, and the overall objective: to skillfully maneuver across the room, avoiding the fiery floor, and proving your agility.
Components of the Board Game
“The Floor is Lava” board game, detailed in its accompanying PDF instructions, boasts a variety of components designed for engaging gameplay. The core consists of 38 Stones: 20 Regular Stones forming the pathway, 12 with a Question Mark, introducing unexpected challenges, and 6 Danger Stones, increasing the risk of falling into the lava.
Adding to the excitement are 50 Challenge Cards, presenting 100 unique obstacles players must overcome. A Spinner dictates game actions, adding an element of chance. The comprehensive PDF manual illustrates how each component interacts, ensuring a smooth and enjoyable experience.
These components, clearly explained within the PDF, combine to create a dynamic and unpredictable game where balance, strategy, and a little luck determine success in avoiding the fiery floor!
Stones: Regular, Question Mark, and Danger Stones
The game’s foundation, as detailed in the PDF instructions, lies within its three stone types. Regular Stones (20 total) create the primary pathway players navigate, demanding careful steps to avoid the “lava.” Question Mark Stones (12) introduce unpredictable challenges, often requiring players to draw a Challenge Card and complete a task.
Danger Stones (6) significantly heighten the difficulty, presenting immediate risks. The PDF clarifies that landing on a Danger Stone often results in a penalty, potentially forcing a player to start over or face other setbacks. Strategic placement of these stones is crucial for a challenging game.
The PDF manual provides clear illustrations and explanations of each stone type, ensuring players understand their function and impact on gameplay, ultimately enhancing the thrilling experience of avoiding the lava!
Challenge Cards: 100 Challenges for Players
Central to the “The Floor is Lava” board game experience, as outlined in the PDF instructions, are the 50 Challenge Cards boasting 100 unique challenges. These cards inject unpredictability and excitement, testing players’ balance, problem-solving skills, and creativity. The PDF details a wide range of challenges, from physical feats like hopping on one foot to mental puzzles requiring quick thinking.
Players landing on a Question Mark Stone typically draw a Challenge Card, adding an element of surprise to each turn. The PDF emphasizes that successfully completing a challenge allows players to continue their journey, while failure may result in a penalty, like losing a turn or moving back spaces.
The PDF manual provides examples of challenges, ensuring players understand the variety and scope of tasks they might encounter, making each game a unique and thrilling adventure!
The Spinner: Determining Game Actions
As detailed in the “The Floor is Lava” board game PDF instructions, the Spinner is a crucial component dictating the flow of gameplay. It introduces an element of chance, influencing player movement and triggering special events. The PDF clearly explains the different sections of the Spinner and their corresponding actions.
Spinning the Spinner might instruct a player to move a certain number of spaces, draw a Challenge Card, or even activate a Danger Stone’s effect. The PDF emphasizes that understanding the Spinner’s possibilities is key to strategic gameplay. It also clarifies how to interpret ambiguous results, ensuring fair play.
The PDF manual highlights that the Spinner adds unpredictability, preventing players from relying on a single strategy and keeping everyone engaged. Mastering the Spinner’s influence is vital for navigating the lava-filled landscape and achieving victory!
Setting Up the Board Game
The “The Floor is Lava” board game PDF instructions detail a straightforward setup process. First, players arrange the 38 Stones – 20 Regular, 12 with a question mark, and 6 Danger Stones – to create a pathway across the “lava.” The PDF emphasizes a varied arrangement for increased challenge.
Next, the 50 Challenge Cards, containing 100 challenges, are shuffled and placed face down in a designated area, as illustrated in the PDF. The Spinner is positioned centrally, ready for action. The PDF clarifies that the initial stone arrangement doesn’t have a fixed pattern, encouraging creativity.
Finally, each player selects a playing piece and places it on the starting stone. The PDF stresses the importance of reading the complete instructions before beginning to ensure everyone understands the rules and setup. Prepare for a lava-filled adventure!
“The Floor is Lava” as a Tabletop Roleplaying Game
“The Floor is Lava” can be transformed into a captivating tabletop roleplaying experience, detailed in the “The Secret Book of Tiki” PDF. This adaptation moves beyond simple avoidance, introducing character creation and narrative elements. The PDF outlines a system where players embody adventurers navigating a treacherous, lava-filled landscape.
The PDF provides guidance on crafting unique characters with special abilities, allowing for strategic movement and problem-solving. Game Masters (GMs) utilize the environment and challenge cards to create dynamic scenarios. The rules emphasize collaborative storytelling and imaginative roleplay, enhancing the core concept.
The “Secret Book of Tiki” PDF details how to incorporate skill checks and consequences for falling into the lava, adding depth and risk. It’s a flexible system, encouraging GMs to customize rules and create a truly immersive experience.
Rules from “The Secret Book of Tiki”
“The Secret Book of Tiki”, accessible as a PDF, details a comprehensive tabletop roleplaying game adaptation of “The Floor is Lava”. This PDF outlines character creation, utilizing attributes and skills to navigate the perilous environment. Players define adventurers, each with unique strengths and weaknesses, impacting their lava-avoidance capabilities.
The PDF introduces a dice-rolling mechanic for skill checks, determining success in overcoming obstacles and avoiding the “lava”. Falling into the lava results in consequences, ranging from temporary setbacks to character elimination, depending on the severity.
Game Masters (GMs) are guided on crafting scenarios and challenges, utilizing the environment and incorporating narrative elements. The PDF emphasizes collaborative storytelling and imaginative problem-solving, transforming the simple game into a rich roleplaying experience. It provides a framework for endless adventures!
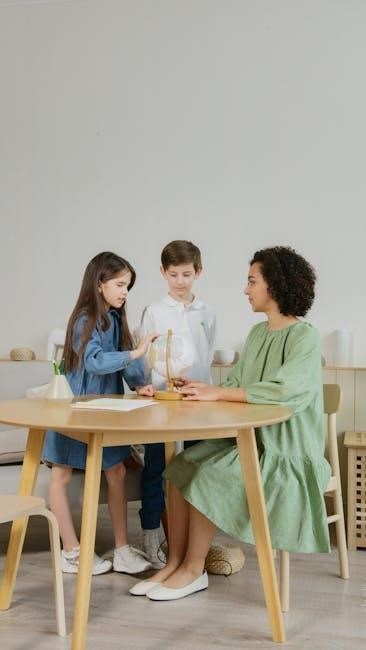
Educational Applications: Using the Game in Learning
“The Floor is Lava” transcends simple entertainment, offering valuable educational opportunities. Utilizing the game, educators can foster problem-solving skills as children strategize safe routes and quick decisions. The game inherently encourages physical activity, promoting gross motor skill development and spatial awareness.
Instructors can integrate the game into lessons on physics, discussing concepts like balance, momentum, and gravity. Furthermore, it stimulates creativity and imagination, as players invent narratives and utilize objects as safe zones. A PDF detailing variations can inspire lesson plans.
The game also promotes social-emotional learning, requiring cooperation, communication, and turn-taking. Analyzing “The Floor is Lava” PDF instructions can even become a reading comprehension exercise, enhancing literacy skills in a fun, engaging manner.
Safety Considerations: Playing Without Injury
Prioritizing safety is crucial when playing “The Floor is Lava.” Clear a spacious playing area, removing obstacles like furniture with sharp edges or unstable items. Emphasize the importance of controlled movements – no running or pushing! Encourage players to assess the stability of chosen “safe zones” before committing their weight.
Supervision is essential, particularly with younger children. A review of the game’s PDF instructions can highlight potential hazards and reinforce safe play guidelines. Discourage jumping from significant heights and remind players to land with bent knees.
Establish boundaries and clearly define what constitutes “lava” to prevent accidental collisions. Consider designating a “safety officer” to monitor gameplay and intervene if necessary. Adapt the game to suit the physical abilities of all participants, ensuring an enjoyable and injury-free experience.
Advanced Rules & Challenges
Elevate your “Floor is Lava” gameplay with advanced rules! Introduce timed challenges, requiring players to remain on safe zones for a specified duration. Implement a “rescue” mechanic, allowing players to assist fallen comrades – but at a risk! Utilize the PDF instructions from the board game adaptation for inspiration, incorporating challenge cards that demand physical or mental feats.
Create themed lava flows – “slow lava” restricts movement speed, while “bubbly lava” introduces unpredictable shifts. Designate “power-up” zones granting temporary advantages, like extra jumps or immunity.

For tabletop roleplaying, as detailed in “The Secret Book of Tiki” PDF, introduce character abilities and narrative elements. Encourage players to invent their own challenges and rules, fostering creativity and strategic thinking. Remember, the goal is to enhance the fun and complexity!
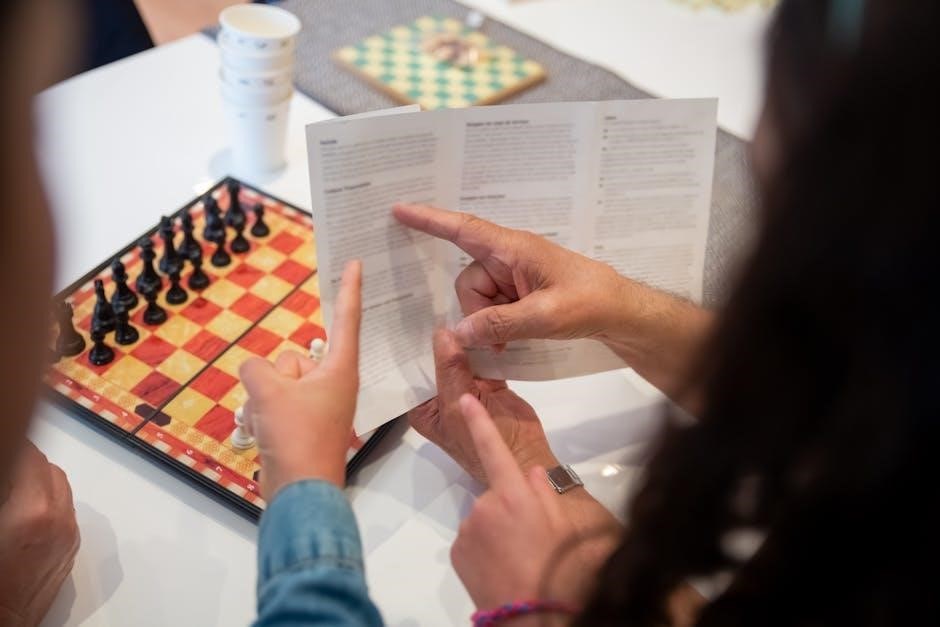
Finding Instructions: PDF Resources Online
Locating comprehensive “Floor is Lava” instructions is easy! Start with a direct search for “The Floor is Lava board game instructions PDF” to access the official rulebook from Magma Games. This PDF details setup, stone types, challenge cards, and spinner mechanics for a complete gameplay experience.
For those interested in the tabletop roleplaying adaptation, “The Secret Book of Tiki” is available as a PDF via platforms like Flipbookpdf.net. This resource unlocks a world of narrative possibilities and character-driven gameplay.
Numerous fan-created rule variations and challenge ideas are shared online, often compiled into shareable PDF guides. A simple web search will reveal these community resources, offering fresh twists on the classic game. Remember to verify the source before implementing new rules!
Age Appropriateness: Who Can Play?
“The Floor is Lava” boasts remarkable accessibility, appealing to a broad age range! The classic, unstructured version is fantastic for preschoolers and young children, fostering imagination and gross motor skills. Supervision is key for younger players to ensure safe jumping and landing.
The Magma Games board game adaptation is officially recommended for ages 5 and up, due to the strategic thinking required for challenge cards and stone navigation. However, adaptable players may enjoy it with guidance from age 4.
The tabletop roleplaying version, detailed in “The Secret Book of Tiki” PDF, can be tailored for older children and teens, encouraging storytelling and collaborative problem-solving. Ultimately, the game’s adaptability makes it enjoyable for families and groups of all ages!
Number of Players: Solo, Small Group, or Large Group
“The Floor is Lava” demonstrates incredible versatility in player count! The original game thrives with 2 or more participants, creating dynamic competition and hilarious moments as players scramble for safety. However, the fun doesn’t end there!
A single player can enjoy a solo challenge, testing their agility and problem-solving skills against an imaginary lava flow. The Magma Games board game officially supports 3 or more players, fostering interaction and strategic gameplay.
The tabletop roleplaying adaptation, outlined in the “The Secret Book of Tiki” PDF, accommodates one or more players, allowing for both individual adventures and collaborative storytelling. Regardless of group size, “The Floor is Lava” guarantees engaging entertainment!
Winning the Game: Is There a Definitive Winner?
Determining a “winner” in “The Floor is Lava” depends on the chosen variation. The classic childhood game often lacks a formal winner; the goal is simply survival and avoiding the “lava” for as long as possible, fostering cooperative play and imaginative fun.
The Magma Games board game introduces a more competitive element. Players aim to be the last one remaining on safe stones, skillfully navigating challenges and avoiding “Danger” stones. Instructions within the game’s PDF detail scoring and elimination rules.
The tabletop roleplaying version, detailed in “The Secret Book of Tiki” PDF, focuses on narrative and collaborative storytelling, deemphasizing traditional winning. Success is measured by creative problem-solving and a shared, engaging experience, rather than a definitive victor!