
RAC Rally 2023 Route Map: A Comprehensive Overview
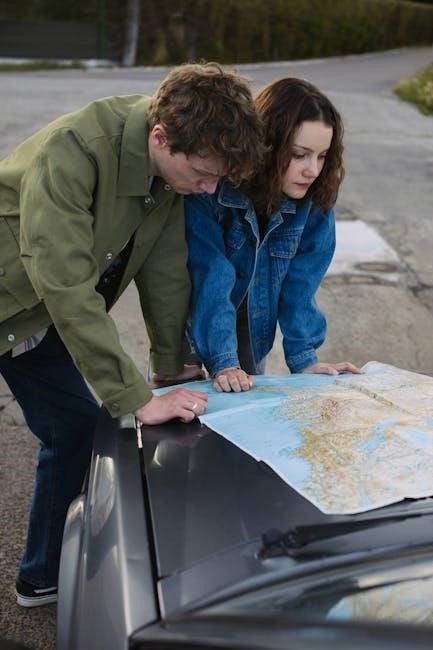
Detailed route maps for the 2023 RAC Rally are readily available as PDFs, alongside Google Maps integrations. These resources enhance spectator planning and competitor strategy,
providing crucial navigational insights. YouTube previews showcase the challenging terrain.
Historical Context of the RAC Rally
The RAC Rally, steeped in motorsport history, initially emerged as the Royal Automobile Club Rally in 1951. It quickly gained prominence as one of the most demanding and prestigious events in the World Rally Championship (WRC). Originally a grueling test of endurance, navigating challenging British roads and forests, the rally has evolved significantly over the decades.

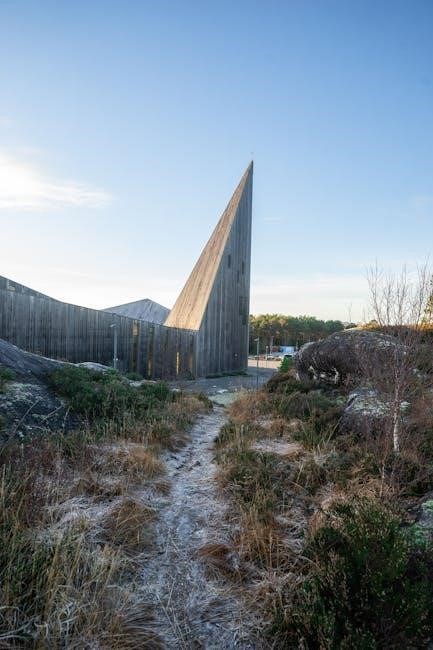
Early iterations focused on regularity rather than outright speed, testing drivers’ consistency and navigational skills. As the sport progressed, the rally embraced timed stages, pushing competitors to their limits. The forests of Wales, particularly, became synonymous with the RAC Rally, offering notoriously tricky conditions – muddy tracks, unpredictable weather, and demanding terrain.
Modern iterations, like the 2023 event, continue this tradition, though with increased emphasis on safety and spectator accessibility. Resources like PDF route maps and Google Maps integrations are a far cry from the paper maps of the past, yet the core challenge – conquering the British countryside – remains. The rally’s legacy is one of innovation and adaptation, reflecting the evolution of rallying itself.
The 2023 Rally: Overview and Significance
The 2023 RAC Rally, officially known as the Rally of the Tests, marked a significant return to form for the event, attracting a strong field of international competitors. Held in the challenging forests of North Wales, the rally presented a demanding course, testing both driver skill and vehicle reliability. This year’s event was particularly notable for its varied stages, encompassing fast gravel tracks and more technical, tighter sections.
The rally’s significance extends beyond its competitive aspect; it’s a major economic driver for the region, attracting thousands of spectators and generating substantial revenue. Furthermore, the 2023 rally served as a crucial proving ground for new technologies in the automotive industry, with teams utilizing advanced data analysis and vehicle setup techniques.
Access to detailed route information, including PDF maps and Google Maps integrations, was paramount for both competitors and fans. These tools allowed for strategic planning and enhanced the overall spectator experience, enabling informed viewing choices along the rally route. YouTube previews, like those available online, further heightened anticipation and provided valuable insights.
Key Stages of the 2023 RAC Rally
The 2023 RAC Rally featured a diverse range of stages, each presenting unique challenges for competitors. These stages were meticulously mapped and documented, with PDF route maps widely circulated to teams and available to spectators. Google Maps integrations provided a dynamic visual aid, allowing for detailed stage reconnaissance and strategic planning.
Key stages included challenging forest sections demanding precision and car control. Competitors relied heavily on accurate pace notes derived from these maps. The varied terrain necessitated adaptable setups and driving styles. Access to these resources was critical for success.

Detailed stage breakdowns, often previewed on platforms like YouTube, highlighted critical corners, surface changes, and potential hazards. Utilizing both PDF maps and Google Maps, teams could simulate runs and optimize their strategies. The integration of digital tools significantly enhanced the rally’s logistical complexity and competitive intensity, ensuring a thrilling spectacle for all involved.

Stage 1: Hafren Forest

Hafren Forest kicked off the 2023 RAC Rally, immediately testing competitors with its notoriously tricky stages. Detailed PDF route maps were essential for navigating the complex network of forest tracks, showcasing elevation changes and tight corners. Google Maps integrations offered a broader perspective, allowing teams to visualize the stage’s overall layout and plan their approach.
This opening stage demanded precision and a cautious approach, as hidden rocks and deceptive cambers lay in wait. Competitors utilized the PDF maps to identify critical braking points and optimize their line choices. The forest’s challenging nature meant that early errors could prove costly.
Pre-rally reconnaissance, aided by both PDF documentation and Google Maps, was crucial for building confidence and establishing competitive pace notes. YouTube previews often highlighted the specific difficulties of Hafren, further emphasizing the need for thorough preparation. Successfully tackling Hafren Forest set the tone for the entire rally.
Stage 2: Sweet Lamb
Sweet Lamb, a classic of the RAC Rally, presented a different challenge to Hafren Forest – fast, flowing stages with large jumps and sweeping corners. PDF route maps were vital for understanding the stage’s rhythm and identifying optimal jump approaches. Google Maps views allowed teams to appreciate the stage’s undulating terrain and plan for crests and compressions.
This stage favored drivers with a bold and confident style, rewarding commitment and precise car control. The PDF maps highlighted potential dangers, such as hidden ditches and narrow passages. Competitors relied on detailed pace notes, built during reconnaissance, to maximize their speed.
Google Maps proved particularly useful for visualizing the stage’s overall flow, enabling teams to anticipate changes in direction and adjust their strategy accordingly. YouTube previews showcased the spectacular jumps and challenging corners of Sweet Lamb, emphasizing the need for a well-prepared car and a fearless driver.
Stage 3: Myherin
Myherin is renowned for its technical and demanding nature, featuring narrow lanes, tight corners, and frequent changes in surface grip. PDF route maps were absolutely essential for navigating this complex stage, detailing every hairpin bend and deceptive crest. Competitors meticulously studied these maps to identify braking points and optimal lines.
Google Maps offered a valuable overview of Myherin’s challenging topography, allowing teams to visualize the stage’s elevation changes and plan their gear selection. The stage’s tricky conditions demanded a precise and measured driving style, prioritizing accuracy over outright speed.
Detailed reconnaissance, aided by PDF maps, was crucial for identifying hidden rocks and potential hazards. YouTube previews highlighted the stage’s unforgiving nature, showcasing the importance of a robust suspension setup and a skilled driver. Google Maps assisted in understanding the stage’s flow, helping drivers anticipate upcoming challenges and maintain momentum.
Stage 4: Dyfi Forest
Dyfi Forest presented a unique challenge in the 2023 RAC Rally, characterized by its fast, flowing stages and unpredictable weather conditions. PDF route maps were indispensable for understanding the stage’s intricate network of forest tracks, highlighting subtle changes in camber and surface texture. Competitors relied on these maps to pinpoint optimal driving lines and anticipate potential hazards.
Google Maps provided a broader perspective of Dyfi Forest’s expansive terrain, aiding teams in visualizing the stage’s overall layout and identifying potential spectator access points. The stage’s high-speed nature demanded unwavering concentration and a precise understanding of the car’s handling characteristics.
Detailed PDF reconnaissance notes, combined with Google Maps’ topographical data, allowed drivers to prepare for the stage’s numerous crests and compressions. YouTube previews showcased the stage’s breathtaking scenery and the demanding driving conditions, emphasizing the need for a well-prepared and focused team.
Stage 5: Gartheiniog
Gartheiniog, a renowned stage in the 2023 RAC Rally, demanded both precision and courage from competitors. Its narrow, winding tracks, often shrouded in mist, presented a significant navigational challenge. PDF route maps proved crucial, detailing every hairpin bend, crest, and deceptive corner. These maps weren’t merely guides; they were essential tools for survival.
Google Maps offered a valuable overview of Gartheiniog’s undulating landscape, allowing teams to strategize and anticipate the stage’s demanding profile. Understanding the elevation changes was paramount for brake point calculations and maintaining momentum. Spectators utilized Google Maps to locate safe vantage points.
The combination of detailed PDF reconnaissance notes and Google Maps’ visual representation enabled drivers to build a comprehensive mental map of the stage. YouTube previews highlighted the stage’s technical complexity and the potential for drama, underscoring the importance of meticulous preparation and a flawless execution.
Route Map Availability: PDF and Digital Formats
Comprehensive route maps for the 2023 RAC Rally were distributed in both PDF and digital formats, catering to diverse preferences and technological capabilities. The PDF versions offered a traditional, printable format ideal for detailed study and note-taking, proving invaluable for competitor reconnaissance. These detailed maps included stage diagrams, distances, and hazard warnings.
Alongside the PDFs, digital formats, including interactive maps integrated with Google Maps, provided a dynamic and geographically contextualized experience. This allowed teams to visualize the stages in relation to the surrounding terrain, aiding in strategic planning and identifying potential spectator access points.
Google Maps integration facilitated real-time tracking and offered a broader understanding of the rally’s geographical scope. YouTube previews showcased the terrain, complementing the map data. Access to both PDF and digital resources ensured that competitors and enthusiasts alike were well-equipped to navigate and enjoy the event.

Google Maps Integration for Spectator Information
Google Maps played a pivotal role in enhancing the spectator experience at the 2023 RAC Rally. The official rally website integrated Google Maps to pinpoint prime viewing locations, parking areas, and public transport links. This interactive feature allowed fans to plan their visit efficiently, minimizing travel time and maximizing their rally viewing opportunities.
Google Maps layers displayed designated spectator zones, clearly indicating safe and permitted areas for watching the action. Crucially, the integration also highlighted restricted zones and potential hazards, promoting spectator safety. Information regarding stage start and finish times was overlaid onto the map, enabling precise timing of visits.
Furthermore, the Google Maps integration was updated with real-time information regarding road closures and traffic conditions, ensuring spectators were aware of any disruptions. Complementary PDF route maps provided detailed stage layouts. YouTube previews offered visual context, enriching the map-based information and creating a comprehensive resource for rally fans.

Spectator Access Points and Considerations
Access to spectator areas at the 2023 RAC Rally required careful planning. Designated viewing points were strategically located along the stages, offering safe vantage points for observing the competition. The official rally PDF route maps clearly indicated these access points, alongside parking facilities and public transport options. Google Maps integration further enhanced accessibility, providing turn-by-turn directions.
However, spectators were advised to arrive early, as parking spaces were limited and filled quickly. Many areas required walking considerable distances from parking to viewing locations, necessitating appropriate footwear and clothing. Consideration for local residents and landowners was paramount; spectators were urged to respect private property and adhere to designated pathways.
Safety briefings, available online and at event hubs, emphasized the importance of staying behind safety barriers and following marshal instructions. YouTube previews highlighted the challenging terrain, reinforcing the need for caution. Utilizing both PDF maps and Google Maps ensured informed and responsible spectator attendance.
Safety Guidelines for Spectators
Spectator safety was a top priority at the 2023 RAC Rally. The official rally PDF route maps included crucial safety information, detailing prohibited areas and recommended viewing zones. Google Maps integrations aided in identifying safe routes to spectator points, avoiding hazardous areas like stage crossings. Staying behind safety barriers was strictly enforced, protecting viewers from fast-moving rally cars.
Marshals, strategically positioned throughout the stages, provided guidance and enforced safety regulations. Spectators were urged to pay close attention to their instructions and report any concerns immediately. Appropriate clothing, including sturdy footwear and high-visibility vests, was strongly recommended. YouTube previews showcased the speed and power of the vehicles, emphasizing the potential dangers.
Understanding the rally schedule, available in the PDF format, was vital to avoid being in unsafe locations during competitor runs. Utilizing both the PDF maps and Google Maps resources contributed to a safe and enjoyable rally experience for all attendees.
Impact of Weather Conditions on the Route
The 2023 RAC Rally route was significantly impacted by unpredictable Welsh weather. PDF route maps, while detailed, required constant updates due to potential stage alterations caused by rain and fog. Google Maps proved invaluable for monitoring road closures and accessing real-time information regarding stage conditions. Muddy conditions, common in Hafren and Myherin forests, demanded careful navigation from competitors and influenced spectator access.
Heavy rainfall led to reduced visibility and increased risk of aquaplaning, prompting organizers to modify stage layouts. The PDF documentation included contingency plans for such scenarios, and Google Maps allowed spectators to track these changes. Marshals played a crucial role in assessing ground conditions and advising on safe viewing locations.
YouTube previews highlighted the challenging terrain, exacerbated by the weather. Access to certain spectator points was restricted due to flooding, as indicated on updated PDF maps and Google Maps alerts, ensuring spectator safety throughout the event.
Notable Route Changes from Previous Years
The 2023 RAC Rally featured several notable route modifications compared to prior events. While PDF route maps provided a comprehensive overview, they also detailed these alterations. A key change involved a revised stage layout in Dyfi Forest, designed to enhance both competitor challenge and spectator viewing opportunities. Google Maps integrations allowed for easy comparison with previous year’s routes, highlighting these differences.
The Sweet Lamb stage underwent significant resurfacing, impacting tire strategy and driving lines, as noted in supplementary PDF documentation. Organizers also introduced a new spectator zone near Gartheiniog, clearly marked on both PDF maps and Google Maps, improving accessibility.
YouTube previews showcased these changes, emphasizing the increased technical difficulty of certain sections. Updated PDFs and Google Maps data were crucial for competitors and spectators alike to adapt to the revised route, ensuring a safe and engaging rally experience.
Competitor Strategies Based on Route Characteristics
Analyzing the 2023 RAC Rally route, detailed in available PDF maps, heavily influenced competitor strategies. The challenging forest stages – Hafren, Myherin, and Dyfi – demanded precise pacenotes and robust suspension setups. Google Maps provided valuable reconnaissance opportunities, allowing drivers to visualize stage profiles and identify potential hazards.

Tire selection was critical, informed by the route’s mix of gravel, mud, and potentially icy conditions, as highlighted in the official PDF documentation. Competitors focused on balancing speed with tire preservation, particularly on longer stages like Gartheiniog.
YouTube previews offered insights into stage conditions, aiding in strategic decisions. The revised Sweet Lamb stage, visible on Google Maps, prompted adjustments to braking points and cornering speeds. Successful strategies prioritized adaptability and accurate route assessment using all available resources – PDF maps, Google Maps, and observational data.
Live Rally Tracking and Timing Information
Real-time tracking of competitors during the 2023 RAC Rally was facilitated through the official rally website and dedicated motorsport apps. These platforms utilized GPS data to display car positions on a dynamic map, often integrated with Google Maps technology for enhanced visualization. Stage times and overall standings were updated live, providing fans with up-to-the-second information.
The detailed stage maps, available as PDF downloads, correlated with the live tracking data, allowing spectators to anticipate car arrivals at specific points. Timing information, including split times and stage completion times, was crucial for competitors and teams to assess performance and adjust strategies.
YouTube previews and social media updates often featured links to the live tracking platforms. Utilizing the PDF route maps alongside live timing data enabled a comprehensive understanding of the rally’s progress, enhancing the spectator experience and providing valuable insights into competitor performance.
Media Coverage and Broadcast Schedules
The 2023 RAC Rally received extensive media coverage, encompassing television broadcasts, online streaming, and social media updates. Television schedules featured highlights packages showcasing the challenging stages, often utilizing aerial footage that visually demonstrated the complexities of the route map. Online streaming services provided live coverage of select stages, allowing fans worldwide to follow the action in real-time.
Many broadcasts incorporated Google Maps visualizations to illustrate the rally’s geographical scope and the intricacies of each stage. PDF versions of the route maps were frequently referenced by commentators to explain competitor strategies and potential challenges.

YouTube channels, like those offering previews (as seen in search results), played a significant role in pre-rally promotion and post-event analysis. Social media platforms were utilized for live updates, stage timings, and behind-the-scenes content, often linking to official resources including downloadable PDF maps.
Official RAC Rally Website and Resources
The official RAC Rally website served as the central hub for all information pertaining to the 2023 event. A dedicated section housed downloadable PDF versions of the official route map, providing competitors and enthusiasts with detailed stage layouts, service park locations, and spectator access points. These maps were regularly updated to reflect any last-minute changes or modifications.
Furthermore, the website integrated Google Maps functionality, allowing users to interactively explore the rally route and pinpoint key locations. This feature proved invaluable for spectators planning their viewing positions and understanding the geographical context of the event.
Beyond the maps, the official site offered comprehensive rally information, including competitor lists, stage timings, live timing updates, and media accreditation details. Links to official social media channels and partner websites were also prominently displayed, ensuring fans had access to a wealth of resources. YouTube previews, like those available online, were often linked from the official site.
Future of the RAC Rally Route
Looking ahead, the future of the RAC Rally route will likely continue to leverage digital technologies, building upon the successful integration of PDF maps and Google Maps platforms utilized in 2023. Organizers are expected to enhance the interactive map experience, potentially incorporating real-time competitor tracking and 360-degree stage previews.
Sustainability and environmental considerations will play an increasingly important role in route planning. Efforts to minimize the rally’s impact on local communities and sensitive ecosystems will likely lead to adjustments in stage layouts and spectator access policies.
The availability of detailed route maps, both in traditional PDF format and through dynamic Google Maps interfaces, will remain crucial for both competitors and spectators. Online resources, including YouTube previews, will continue to supplement the official information, offering valuable insights into the challenges and excitement of the rally. Adaptability and responsiveness to changing conditions will be key to ensuring the long-term viability and appeal of the RAC Rally route.